Showing posts with label Dessert. Show all posts

Thursday, February 28, 2013

Apple Cinnamon Biscotti

Hello darling readers!


I love Italy... Or at least I think I do. I've never actually been. But I do love the idea of Italy.

Carafes of Tuscan wine. Cafes with cute little patios. Football...the real football. Not American football. The architecture. The canals. Endless meals of pasta, gnocchi and fresh tomato sauces and herbs and cheese. Tiramisu. And the language - oh so pretty.


Okay, that sounds an awful lot like any country I imagine in Western Europe. But there's nothing wrong with that.

Sometimes I think I was born in the wrong place. I think I was meant for small town European living. Italian living. On the coast. On a small little farm with dogs and chickens and ducks, a couple of pigs and our own acre of vegetables. Detached from the materialism of North American culture, I'd get around on an old bicycle with a basket on the front. Every day would be a balmy 24 degrees and sunny. My days would be spent making slow food that we'd eat on the veranda looking out over the country side. I'd can tomato sauce made from tomatoes off my own vines and write and paint and read and sip tea and coffee all day long... my own home-made biscotti on the side.


Well, I've got the biscotti down, anyhow.

Baby steps, my friends. Baby steps.

Apple Cinnamon Biscotti
(printable recipe) - makes a lot.


Ingredients:

2 C Flour+ extra for dusting.
2 Tsp Baking Powder.
1/2 C Sugar + extra for dusting.
1 Tsp Salt.
1 Tsp Ground Cinnamon.
Pinch of Nutmeg.
2 Tsp Pure Vanilla Extract.
2 Pastured Eggs, room temperature.
6 Tbsp Butter, room temperature.
1 C Apple, cored and diced.
1/2 C Blanched Slivered Almonds, toasted.

What to Do:

Pre-heat your oven to 325 degrees F and line a baking sheet with parchment paper.

In a medium sized bowl, combine the dry ingredients save for the sugar. In another, the wet - but not the butter.

In a third bowl, cream the butter and sugar until light and fluffy. Add the wet mixture. Mix well. Then add the dry, followed by the almonds and the apple.

Dump onto a well floured counter and massage until it's semi-dough like. Break into two halves and place each one on the parchment lined baking sheet. 

Shape into logs, about 1 1/2" thick and sprinkle with a little extra sugar.

Bake in hot oven for 25 - 30 minutes. Remove from the heat and allow to cool about 15 minutes. 

Slice the logs at an angle. Place back in the oven and bake a further 20 - 25 minutes. Remove from the heat. Place biscotti pieces on wire racks to cool completely before serving.

Serve with a big cup of tea.

Eat.

What's your dream life look like? Where would you live? What would you do?

Photobucket

Thursday, January 17, 2013

Rippin Another Blog: Chocolate Covered Bananas Wrapped in Walnuts

Good morning dear readers!

Can you believe I'm still eating sweets?? 

I can. It seems to me that we crave what we eat. If you're in the habit of munching on salt, you want salt. If you tend to lean toward green, you want veggies. Meat eaters like their meat. And sweet eaters like their sweet. 


Christmas made a sweet eater out of me. And while I'm definitely on the road to vegetables again, I still crave a treat. 

This snack was about as split as banana can be. Well, except for the ice cream and candy sprinkles. But it was half fruit, half sweet. And I'm good with that. Throw in the nuts and you've got yourself one tasty, happy fat rich snack.

The recipe comes from The Joyful Table. A blog by a woman named Noelle who reaches out and touches my little heart soul. Not literally. Ouch. But figuratively - she's all about finding joy in the cherished moments around her kitchen table. That's my kinda scene. And while she touts this recipe as "embarassingly simple" - it's the simple things that make a dish worth eating. 

Thank you Noelle - I needed this today. Or at least my mouth did.

Chocolate Covered Bananas Wrapped in Walnuts
(printable recipe) - Serves 4.


Ingredients:

2 Bananas, with the peels just a little green still.
1 C Good Quality Dark Chocolate, roughly chopped.
1 C Roasted Walnuts, roughly chopped.
4 Wooden Skewers.

What to Do:

Peel the bananas and slice them in half lengthwise. Impale them on the skewers and place on a parchment paper lined plate. Place in the freezer for 30 minutes while you get the rest of the ingredients ready.

Get the rest of the ingredients ready...

Dump the chocolate pieces into a double boiler (a pot with 2 inches of water and a glass bowl that fits over top works well - make sure the water doesn't hit the bowl).  Heat the water to a boil over medium heat, stirring the chocolate constantly to ensure it doesn't burn. Once melted and hot, remove from heat.

Place the walnuts in a large shallow bowl. Set aside.

Remove the bananas from the freezer and dredge in the chocolate and then the nuts.

Place back on parchment paper and place in the fridge for 30 - 60 minutes or until chocolate hardens.

Eat. 


What are your go-to desserts? Are you still stuck on the holiday sweet train? Choo choo!


Photobucket


Thursday, August 30, 2012

Figured Figs Were a Good Idea

....And I was right!


But before we get to that... I must tell you: It is an end of an era. And I'm not talking about the Lance Armstrong debacle - seriously though folks, can't we just let the guy be? Hasn't losing parts of his manly bits been hard enough on him? His tests have been clean. Refusal to participate in on-going harassment doesn't = guilt, it does however mean he might not be willing to subject his life, energy, emotions, time, and money in what could possibly be an endless (and fruitless) inquiry into his abilities. And also, why do we care so much about whether he did or didn't juice? Is that going to determine if you get that raise next month? Or establish where your next vacation should be? Or what color you decide to highlight your hair? Let the guy alone for gods sake.

Wow. That one really got away from me. Uhhh....

Right. End of an era. I'm moving across the country tomorrow from Victoria to Toronto. Holy crap.


As I said yesterday on Gastronomical Sovereignty, everything is in boxes, the movers just came, and I will be sleeping on quality MEC camping gear for the next 9-14 days until my shit shows up at the new place. So I'm leaving you with two gifts over the next two weeks...

The first is a fabulous guest post next week from the ever amazing Courtney @ The Fig Tree. She's got a real gem in store for you! 


The second is a recipe inspired by the title of her blog.... because I figured figs were a good idea. And as I said above, I was right! But c'mon, let's be honest here - when am I ever not right?

Figs are just about everywhere right now. Soft, juicy, deliciously tangy yet tenderly sweet... I love me some figs!

When brother was in town visiting this week I picked up a basket at the farmer's market. And boy sure as heck as ants on a log I was happy that I did! This little dish is simple, quick, and fabulously sweet yet salty to boot!

I suggest you make some for yourself. Soon.

Stuffed & Tucked Prosciutto Wrapped Figs
(printable recipe) - serves 4.


Ingredients:

4 Ripe Figs.
6 Oz Quality Soft Goats Cheese.
4 Big Basil Leaves.
4 Thin Slices of Prosciutto.
4 Tbsp Local Organic Honey.
'Lil Balsamic Reduction.
Small Handful of Toasted Walnuts, roughly chopped.
Fresh Cracked Black Pepper, to taste.

What to Do:

Pre-heat your BBQ to medium-high heat.

As that warms, place the goat cheese and black pepper in a bowl and mash together.

Make a thin slit in the side of each fig to the center. Gently stuff with an ounce or so of peppery cheese and place basil leaf on top of the cut. Carefully wrap in a piece of prosciutto and carefully press to hold.

Place figs on the grill and BBQ for about 1 and a half to 2 minutes per side or until prosciutto is crisp and cheese is oozy.

Plate and drizzle with honey, balsamic reduction and sprinkle with a few chopped nuts.

Eat.

Wish me luck, my lovelies!

Photobucket


Tuesday, August 28, 2012

Spiced Red Wine Poached Pears

The Lowdown:


I'm not sure if it's because school is nearing, or if it's because summer is slowly fading away, or it's because some of my closest friends are moving away, but for some reason I have lost my drive and motivation to cook. It's almost as if a forcefield or warding spell was erected around my kitchen, like garlic to a vampire (not the fruity type of vampires that seem to be all the rage these days, the real vampires that used to cause nightmares). Not only have I stopped cooking, but shopping has taken a hit as well. My freezer is as empty as I've ever seen it. Who would have thought that a cooking funk was a real ailment.

By no means did this recipe get me over the cooking funk, but it was easy. Yes, that is the only reason that I did it. Although poached pears are delicious. Okay, so there were two reasons. Plus pears are in season now so their flavours are so much more pronounced. Okay, okay, so there was three reasons. Either way, it was easy and simple enough to get done despite a bad case of the cooking funks.

I'm not going to lie, I may also have a case of the writing funks too. So for that, I'm going to leave this short. Well, they say a photo is worth a thousand words, so I'll add a few of those to get my word count up. Enjoy. When my cooking/writing funks are over I will bless you with my regular sour wit. Cheers. 


The Playlist:

1 bottle Shiraz (minus a glass for yourself)
1 cup Organic cane sugar
1 tbsp Cinnamon
2 tbsp Vanilla
1 tbsp Allspice
4 Anjou pears, pealed/halved/cored


The Skinny:

  1. Combined all of the ingredients in a medium sized sauce pan and bring to a boil. Once boiling add pears and reduce heat to medium-low. Allow to simmer to 8-10 minutes per side (or if fully submerged cook for 15-20 minutes).
  2. When pears are soft to poke with a fork, remove from heat and allow to sit. The longer they sit the more flavourful and colourful they will be.
  3. Reheat pears in liquid then remove pears and simmer the wine down to about half of the original volume.
  4. Serve pears with a bit of the wine syrup (apparently blue cheese goes well with this too).

Stay Rad -h

Featured on:  Chef in Training, Premeditated Leftovers, 33 Shades of Green, Food Renegade,

Thursday, August 09, 2012

RPI: Mission Pistachios

I'll be honest here... 

...and this doesn't happen too often...

...not being honest - in fact, I very much value and appreciate honesty. It's a quality I hold dear to my heart and I try to be as honest as possible in my life both in my relationships with people, the planet, and my food. Especially my food. I love my food. Yup, when it comes to eating, honesty is the best policy.


So, with respect to eating and honesty, here it is: I was totally befuddled by this week's Rock, Paper, Ingredient assignment. 

When Haydn selected pistachios as the key ingredient, I thought, cool. I like nuts. And let's be honest girls (or boys)..(or anyone who doesn't fit into the traditional gender binary), who doesn't like a good nut from time to time? And pistachios are some good nuts. 

haha! "nuts"....


But when it came down to crunch time - get it, "crunch" time? because nuts are crunchy - I was absolutely shell shocked. I did it again! Get it? "Shell" shocked! I'm sorry, I'll stop. 

...Should I do something savory and crust a salmon? Should I make dessert and try to whip up my own ice cream? Do I mix the two and make pistachio crusted salmon ice cream? Ultimately, I elected for none of the above. Thank god, most likely.


But I did land smack dab in sweet territory*. And I'm sure glad I did because pistachios were made for chocolate. And Chocolate for pistachios. Actually, I'm pretty sure both the nut and especially the chocolate trade were founded to increase white European colonial influence over "Southern" countries around the world at the expense and blood of poor racialized nations while increasing the profit of those at the top of the political, economic and social food chain. But nevermind, because that's a whole other can of worms. Stupid women's studies degree - why 'ya gotta' ruin everything for me?

* a special holla to John for his excellent espresso suggestion. well done, sir. well. done.

Chocolate Cake with Pulverized Pistachios and Espresso Icing
(printable recipe) - serves 8 - 12.


Ingredients for Cake:

1 1/4 C Ice Water.
2 1/4 C White All-Purpose Flour.
1 1/4 Tsp Baking Soda.
1 3/4 C Sugar.
2/3 C Butter, unsalted & at room temperature.
2 Free-Range Organic Eggs, room temperature.
1 Tsp Vanilla Extract.
5 Tbsp Cocoa.
2 Tbsp Butter, melted.

Ingredients for Topping:

1 C Confectioner's Sugar.
1 Tsp Vanilla Extract.
2-4 Tbsp Milk.
1-2 Oz. Fresh Espresso.
Handful of Bashed, Processed, or Chopped Pistachios.

What to Do:

Pre-heat your oven to 350 degrees F & grease & line 2 8X8 spring-based baking pans with parchment paper, or 1 9X13 pan.

In a medium bowl, sift together the flour and baking soda. Set aside.

In a large bowl, cream together the 2/3 C butter and sugar with medium-high powered beaters.

Add the eggs and vanilla. Mix well.

Add the cocoa and melted butter. Combine well.

Now add the flour mixture alternately with the ice water to the creamed mixture by thirds, starting and ending with the flour. Make sure everything is combined before going to the next step.

Pour the mixture evenly between the two pans. Place pans on baking sheets to catch any drips that might occur. Put in the oven and bake 35 to 45 minutes or until the cake slightly pulls away from the sides and a toothpick inserted into the center comes out clean.

Allow to cool for 10 minutes and then release the pan(s). Carefully move each side and then, placing a cooling rack on top of the cake, tip upside down to remove the parchment/bottom. Allow to cool completely.

Topping: Beat the confectioners sugar with vanilla, espresso and half the milk until it becomes silky smooth, spreadable, but still thick. If needed, slowly add 1 more Tbsp at a time until it becomes the texture you want.

Position the cake on a serving platter. Top with the icing and finish with a good helping of pulverized pistachios.

Eat.


What do you think? Is honesty the best policy?


Photobucket

This post is linked up with Cast Party Wednesday; Showcase Your Talent Thursday; Full Plate Thursday; Tastetastic Thursday; The Hearth & Soul Blog Hop via the 21st Century Housewife; Tasty Tuesdays; Tuesday Talent Show.

Thursday, May 17, 2012

Homage to a 1980's Sweet Treat

Happy Thursday my sweets! 

This week Haydn brought you a treat for beer lovers and now I'm bringing you a treat for sweet lovers! 


Why you ask? Because you are my sweets and I love you so I figured why not give my sweets a sweet?

Sweets for sweets!

Now, I'm not a huge dessert fan (says the girl who posted a beet chocolate cake last week and this post this week) but I do like a little somethin' somethin' from time to time... And this little ditty fits that bill.

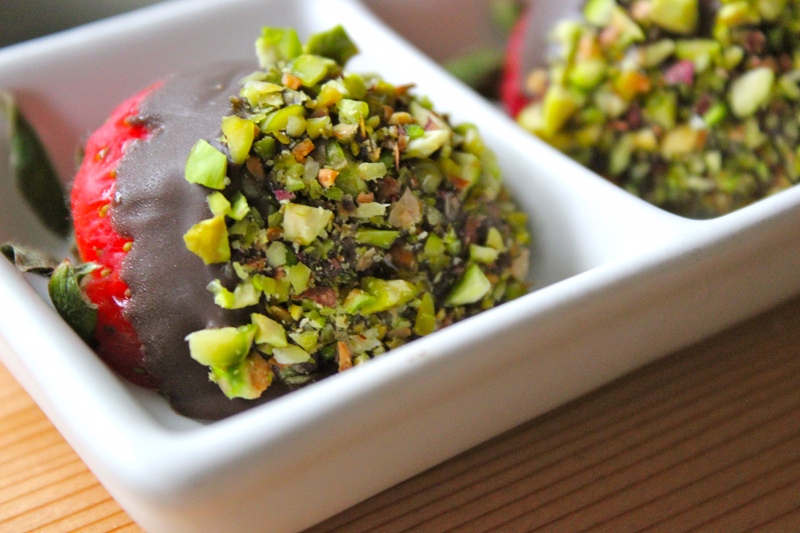
I'm talking chocolate covered strawberries. Ooooooh yeah.


But not in that cheesy 1980's seduce-your-flight-instructor-to-the-tune-of-Take My Breath Away kind of chocolate covered strawberries. No, wait. I do mean those kind of chocolate covered strawberries. Because strawberries dipped in chocolate is hot. And so were 1980's movies. Like this one... OR this one... OR this one!

The real kicker here though are the pistachios. They add a salty, crunchy texture to the mix. And who doesn't want to put something sweet and salty in their mouth? I do! I do! And I did...

Dark Chocolate Covered Strawberries with Crunchy Pistachios


Ingredients:

1 Pint Fresh, Organic Strawberries, washed and well dried & sliced into halves.
1 C Dark Chocolate Baking Disks (the higher quality, the better).
1/2 C Shelled Pistachios, roughly chopped.

What to Do:

In a double boiler - I set a glass bowl over a medium sized pot - bring 1-2 C of water to a boil. Make sure the water in the pot isn't touching the bowl. 

Reduce heat to a medium simmer and add the chocolate to the dry bowl. Stirring very regularly (almost constantly), gently melt the chocolate. Once melted, remove from the heat so the chocolate doesn't burn and set aside.

As the chocolate melts, line a baking sheet with parchment paper.

Now, holding onto the greens of the berries, gently dip the strawbs into the chocolate, followed by the pistachios. Set on parchment paper. Repeat until finished. Place in the refrigerator to cool for at least 30 minutes

Serve with a side of sexy... Or maybe some dark red wine.

Eat. 


What's your favourite bit of the 80's? Or do you think we should try to forget them as quickly as possible? (both answers are fair).

Photobucket


This post is linked up with Whole Foods Wednesday; Cast Party Wednesday; Simple Lives Thursday; Showcase Your Talent Thursday; Full Plate Thursday; Tastetastic Thursday; Fresh Bites Friday; Fight Back Friday; The Hearth & Soul Blog Hop via The 21st Century Housewife; Tasty Tuesdays; Slightly Indulgent Tuesday; Tuesday Talent Show;

Thursday, May 10, 2012

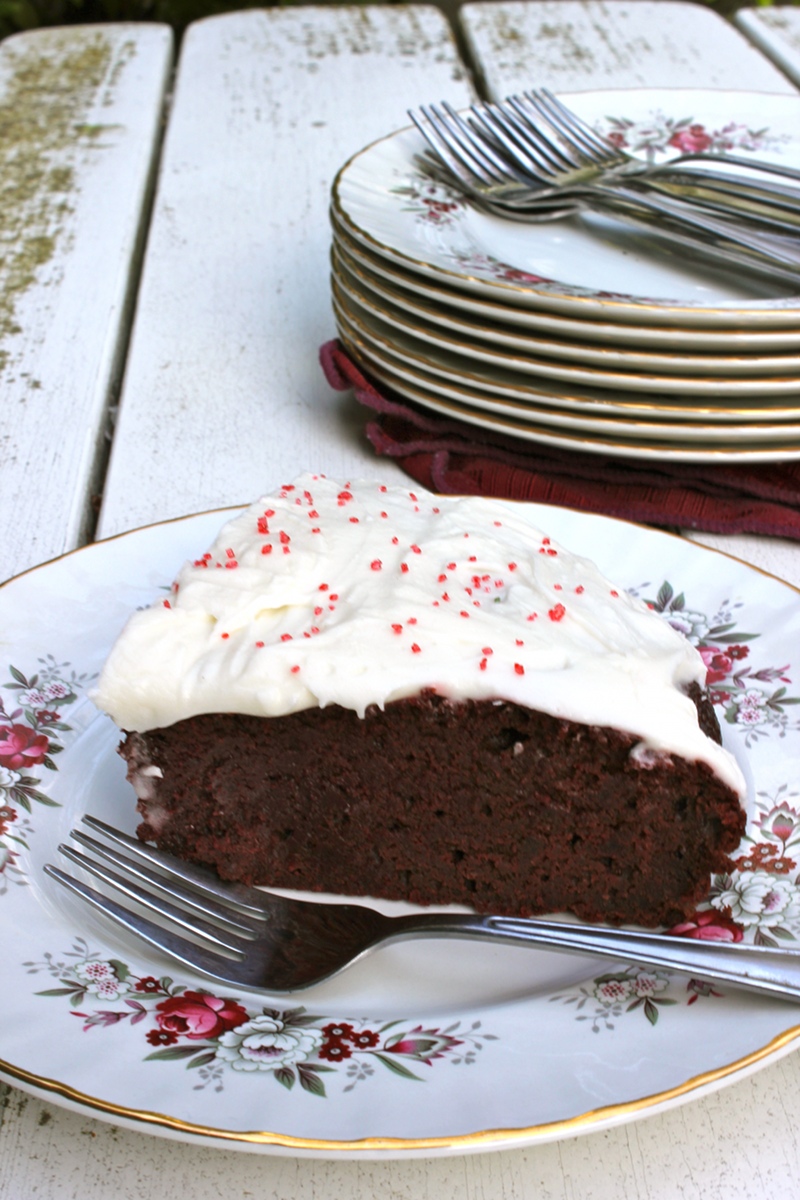
RPI: Mission Beets - Beet Chocolate Cake with Homemade Vanilla Icing

It's true. Haydn and I failed miserably in RPI this week. Not with respect to the dishes we made - which, if I may say, have turned out to be one of the best RPI in recent history - but regarding the competition. With so much going on in our busy lives we forgot to rock, paper, scissor the crap outta each other and claim gluttonous victory over the other.


Meh, what ya gonna do? 

Instead I let him select an ingredient - of which he chose beets. 

I love me some beets. Beets = good. Earthy. Sweet. With an elastic crunchy softness (does that make sense?)...

Having just done a guest post for Stacy @ Seattle Seedling titled I Need A "Beeting" (Please?) - aka Spring Beet Bruschetta - I didn't want to do another goat cheesy, balsamicy, beet filled dish. Because let's be honest with ourselves: goat cheese, balsamic vinegar, and beets are made for each other. In fact, I was tempted to make something similar to this or this. And can you blame me? Holla!

But no. I opted to live on the edge a little. Beets savory? Of course. Beets sweet? Um, yeah. Special thanks have to go to those who recommended I do so because beets in dessert = better than beets themselves. 


Anyone who knows me knows I'm not much of a baker - so fashion my own beet cake recipe? Unlikely to happen. Instead I borrowed Peggy's Recipe @ My Fiance Likes It So It Must Be Good. Peggy and I did a "golden beet off" a few months back and this is what she came up with. Peggy, I am so glad you are in cooking school. Not because you need to learn how to cook because this cake was divine, but because you need to cook more. Do it. Do. It. 


Seriously though, the cake ended up chocolatey, not too sweet, and was baker-challenged friendly. It ended up quite dense - almost like a brownie. And while I could taste the beets in the first few bites - and you should, it is after all, beet cake - the more I ate, the more I enjoyed it. I will be making this again in the near future and savoring every sweet bite.

Mmmmmm beet cake.

Beet Chocolate Cake with Homemade Vanilla Icing


Ingredients for Cake:

1 & 3/4 C Flour.
 2 Tsp Baking Powder.
3/4 Tsp Salt.
3/4 C Cocoa Powder.
1 & 1/4 C Sugar.
Approx 5 to 6 small-medium beets).
3 Pastured Eggs, room temp.
 1/2 C Canola Oil.
1 Tsp Vanilla Extract.

Ingredients for Icing:

3 C Icing (Confectioner's) Sugar.
1/3 C Butter, room temp.
1/3 C Milk.
1 Tsp Vanilla Extract.
Little Red Sprinkles (optional).

What to Do:

First things first, roast the beets. Pre-heat your oven to 400 degrees F. Place beets in a roasting pan with a couple glugs of olive oil and a good pinch of salt and pepper. Shake well to coat. Cover and roast in the oven 45-60 minutes until fork tender, depending on the size and age of the beets. Younger beets cook faster than older ones.

Remove from the oven, allow to cool to touch and then cut off their bums and peel off the skin. Place in a food processor and puree until mostly smooth. You want to end up with 1 and 1/2 C of puree. Set aside.

Change the oven setting to 350 F and cut out a piece of parchment paper large enough to come over the edges of a 9" spring form or cake pan. Lightly grease the paper with either butter or non-stick spray. Set aside.

In a medium bowl, combine flour, baking powder, salt, cocoa and sugar. Mix well. 

In another bowl, whisk together the eggs, beet puree, canola oil and vanilla extract.

Make a well in the dry ingredients and gently pour beet mixture in the middle.  Mix until just combined. Make sure to get to the edges so you incorporate all the dry into the wet. 

Pour into your prepared pan and bake for 45 minutes, or until cake tester comes out clean.

Remove from the oven and allow to cool 10 minutes. Transfer cake to a wire rack and allow to cool completely before frosting or your icing will melt.

To make icing: Put confectioner's sugar, a couple Tbsp of milk, butter and vanilla in a large mixing bowl. Mix on low until combined. Slowly add a little milk at a time, mixing well between additions to ensure complete incorporation. Continue this method until the icing is of the consistency you want. Cover and place in the fridge until ready to frost. You will want to remove it from the fridge and have the icing come to room temperature before you ice the cake. I just let mine sit on the counter covered though because of the dairy in it some people may not want to do that. Fair enough.

Spread icing over the cake, top with sprinkles if using, cut and serve on your Grandmother's prettiest china.

Eat.

To see past RPI competitions, click here.


Photobucket


This post is linked up with Cast Party Wednesday; Full Plate Thursday; Tastetastic Thursday; The Hearth & Soul Blog Hop via The 21st Century Housewife; Tasty Tuesdays; Slightly Indulgent Tuesday; Tuesday Talent Show.

Thursday, March 15, 2012

RPI: MIssion Espresso - Tiramisu

Last night was the most fun I've had in as long as I can remember.

No, not that kind of fun. I wish. 

No, I don't wish. This was better. This was joyous! And phenomenal! And just. plain. epic.

Oh yes - epic. I'm not exaggerating. Last night was absolutely life changing. 


Last night.... I saw Fred Penner. No wait. I experienced Fred Penner.

Do you know who Fred Penner is? You should. He's a beloved and monarch honoured Canadian children's entertainer. His era was in the mid eights - late nineties and he brought musical joy to millions of Canadian children on his television show Fred Penner's Place. These days, he tours the bar scene and does the same thing for the same people, only 15-20 years older.

Who woulda' known that songs like The Cat Came Back, or Sandwiches, or I Had a Rooster, or my personal favourite, Puff the Magic Dragon could elicit such a positive response from so many grown adults. If you can call University kids adults.


Seriously. This guy is either the most generous, kind, and altruistic man that has ever lived... Or he's sure cashing in on a nostalgic gaping wound that has embedded itself in the souls of Canadian University students. 


Did I also mention I got a t-shirt....? And had it signed....? 

Thank you Fred!!!

And now, something to make your little mouth sing: RPI mission - espresso!


I toiled for a bit as to whether I should make a drink or something savory. But after sending out some feelers on Twitter the response was over-whelming: Tiramisu. I know, it seems like the obvious choice for espresso. And it was, which was why I was avoiding it to begin with. But after eating it, I realized there's a reason why the obvious choice is the obvious choice. Because it's fucking good. 

Classic Tiramisu
adapted from Guy Fieri


Ingredients:

 2 C Strongly Brewed Coffee, cooled off.
4-5 Ounces Kahlua (boozy = good!).
3 Egg Yolks.
1 3/4 C Whipping Cream.
1/2 C Sugar.
2 C Mascarpone Cheese.
36 to 42 Lady Finger Cookies.
2 Tbsp Unsweetened Cocoa Powder.
1/4 C Good Quality Shaved Bittersweet Chocolate (optional).

What to Do:

Combine the coffee and the booze in a bowl and set aside.

Bring to a boil a small saucepan with 2 inches of water in it over high heat. Place a glass bowl over the top of the pot to act as a double boiler and add the egg yolks and 1/2 C of the whipping cream. Whisk continually until mixture coats the back of a spoon - approx 5-6 minutes. Remove from the heat and continue whisking for a further 3-4 minutes as it cools. Set aside to cool completely - about 15 to 20 minutes.

Once cooled, in a larger bowl add the remaining whipping cream, prepared yolk mixture, and sugar and beat until soft peaks form. 

*Now, I did this for 30 minutes and it still wouldn't firm up! Not sure why - either way my tiramisu turned out spectacular. If you have any idea why it didn't work (I had a very cold bowl and even put a bag of peas underneath it to help keep it cold) please let me know!

Add the mascarpone cheese and combine well.

Now assemble! Measure out how many lady fingers will fit in the bottom of you pan. I used a 9 X 9 baking dish though the original recipe calls for 9 X 13. Your choice. Now that you know how the cookies will fit in the dish, dip each one briefly on both sides in the coffee/boozy mixture. Place back in the pan. 

After the first layer of cookies are in the pan, spread half the mascarpone mixture over the cookies and sprinkle with half the cocoa powder. Repeat starting with the cookies dipping in the coffee. 

Cover tightly with plastic wrap and refrigerate for at least 6 hours or even better, over night.

If desired, shave the chocolate over the top just before serving. Cut into squares, and serve.

Eat.

Photobucket