Showing posts with label Roast. Show all posts

Thursday, February 07, 2013

RPI: Mission Lamb (Roast Lamb Dinner)

Sometimes you want original... Something new and exciting and inventive.

...and sometimes you want traditional. Moments and places that just shouldn't be ef'd with.

Does that make traditional boring? Nay! It's comforting. And gentle. And in this case, generally and specifically delicious.

When lamb was selected for our next Rock Paper Ingredient challenge, I couldn't have been happier. Lamb is by far, in my top ten ingredients of all time. Nothing beats moist, perfectly cooked lamb with all it's gamey succulence and tender, fall apart in your mouth texture. Lamb. Oh lamb. lamb. lamb. Yes. Lamb. 

Pair it with a big fat, kick ya in the crotch red wine, and you'll have me purring faster than a....well, than a cat getting it's belly scratched. Please don't scratch my belly. Especially when it's full of lamb and red wine. Because chances are, I ate a lot of lamb. And drank a lot of red wine. And I'm havin me some lamby red wine babies - and you should never - EVER - walk up and rub a pregnant woman's belly.

My choice for RPI Mission Lamb: Lamb roast dinner. Ain't nothin' wrong with that. Not boring. Not unoriginal. Not a bad idea at all. In fact, it was comforting. And gentle. And generally and specifically delicious.

Roast Lamb Dinner
(printable recipe) - serves 5-6.


Ingredients:

3 Lb. Lamb Roast, no bone.
1 Head of Garlic, peeled.
2 Apples, cored and cut into quarters.
3 Leeks, washed and sliced.
1 Lemon for juice and zest.
Handful of Fresh Rosemary.
Handful of Fresh Thyme.
1 Tbsp Coriander Seeds.
2 Tbsp Butter.
1 C Dry Red Wine.
Extra Virgin Olive Oil.
Coarse Sea Salt & Fresh Cracked Black Pepper.

What to Do:

12 - 24 hours in advance: Marinate the lamb. First, truss the lamb with butcher string to ensure even thickness of the lamb all the way around. In a pestle and mortar, bash together the coriander, lemon zest, and a good dose of salt and pepper. Once the pods are open and fragrant, pour into a freezer bag or appropriate sealable container along with the herbs and a few good glugs of olive oil. Place lamb in the container and massage into the marinade. Seal and place in the fridge to marinate, occasionally rotating to ensure even marination.

When it's time to cook: Pre-heat your oven to 400 degrees F and place a cast-iron pan over fairly high heat.

As that heats,  place in hot pan and sear until you have good color on each side. Remove from the heat and place on a wire rack in a roasting pan. Throw in the rest of the ingredients - the butter, wine and lemon juice - and tuck around the lamb. Cover and place in oven. Roast for an hour and a quarter to an hour and a half or until a thermometer reads 132-135 degrees F for medium rare.

Remove from the oven, place meat and wire rack over a cutting board and cover with foil. Allow the meat to rest 10-15 minutes. Slice thinly and serve.

While the meat rests, make your sauce. In the same dirty pan you seared the lamb in, add the red wine, a sprig or two of herbs and a good helping of salt and pepper. Bring to a boil over high heat and then turn heat down to a simmer. Allow the wine to reduce by half, making sure to scrape all the bits off the bottom of the pan. Stir in the butter and lemon juice. Strain through a fine sieve and serve along side lamb.

Eat.

Photobucket

Tuesday, June 26, 2012

Bag-Free Brisket (Scratch Made)


The Lowdown:


If corned beef reminds you of some log shaped piece of meat in a bag, you're not alone. With fond memories, I pass by it every time I'm hunting and foraging in the grocery store. I don't remember the last time I had corned beef, but I do recall loving it. That fall apart texture. The aroma. The grip-you-by-the-balls flavour. All things that I appreciate in a meal.

But how many of you have actually made one yourselves? I sure know I haven't. Part of the problem -- that damn curing salt (Prague powder #2 or pink curing salt). I live in Victoria, BC which is by no means a small town. However, finding that salt proved to be a killer. I searched for weeks, going to specialty butchers, delis, grocery stores, markets, and meat shops. Nothing. Then I got the brilliant idea to search online. In the true spirit of difficulty, I couldn't find a place that would ship to Canada. Then, I did. But they had issues dealing with my visa. For the love of everything holy, why can't I buy this damn salt! It's like it's the international salt of mystery. Double-0 Salt, with the dastardly plan of preventing people from making cured meats.


Obviously, since I'm writing this post, you know I've somehow got my grubbly little mitts on some. Let me take you back... way back. So two days ago I was complaining (and by this I mean ranting out of control) about this predicament with a friend, the GM of Smoken Bones, when his chef, who I've become friends with, over heard me. With a simple gesture of his hand, he vanished with a puff of smoke and reappeared moments later with the secret ingredient. No, not eye of newt, a porcupine quill, or old man's beard. It was the Double-0 Salt that has eluded me all these tiresome weeks. Okay, he's not a magician per se, so he didn't really vanish with a puff of smoke. However, he did get me the salt and he is a mastermind when it comes to smoking meats, cheeses, and just about anything else. Warning! Warning! Shameless plug alert! If you're ever in this part of the world check out Smoken Bones.

Back to the mission at hand. I now had the salt of curing in my possession. Fast forward 12 days. The brine has done its magic. The brisket is either ready to be smoked (to make Montreal smoked meat) or boiled to make a traditional brisket dinner. Decisions decisions.


The Lowdown:

3 lbs Beef brisket
1/4 cup Sea salt
2 tbsp Pink curing salt (Prague Powder #2)
Water

2 tbsp Coriander*
5 whole Chili peppers, dried*
2 tbsp Peppercorns, whole*
6 Bay leaves, dried*
2 tsp Cumin, whole*
1 Cinnamon stick, crushed*
1 tsp Clove, whole*
1 Cardamom pod, whole*
1 tbsp Mustard seed*
1 tsp Allspice, whole*

*These ingredients can be skipped if you are choosing to use store bought pickling spice.

The Lowdown:

  1. Place the beef brisket into a sealable container that is large enough to house the brisket, then add pickling spice ingredients, salt, curing salt, and enough water to entirely cover the brisket, and then some (I used approximately 4 cups).
  2. Place in a refrigerator for 7-12 days to allow the pickling spices to ramp up the brisket's flavour.
  3. Remove the brisket from the brine, and allow to soak in regular water for 20-30 minutes to get all the excess salt out of it.
  4. Dump out the soaking water and refill the pot so that 3/4 of the brisket is covered by water. Optional, add a cinnamon stick, a few cloves, some mustard seed, some peppercorns, and some all spice to the water (this will really make the brisket a knockout).
  5. Cover, bring water to a boil, then reduce heat and allow to simmer on low heat for 2-3 hours. Remove from water and serve warm.
  6. Enjoy.


Featured on: Chef in Training, 33 Shades of Green, Premeditated Leftovers, Spain in Iowa, Food Renegade, Lady Behind the Curtain,

Stay Rad - h

Tuesday, April 10, 2012

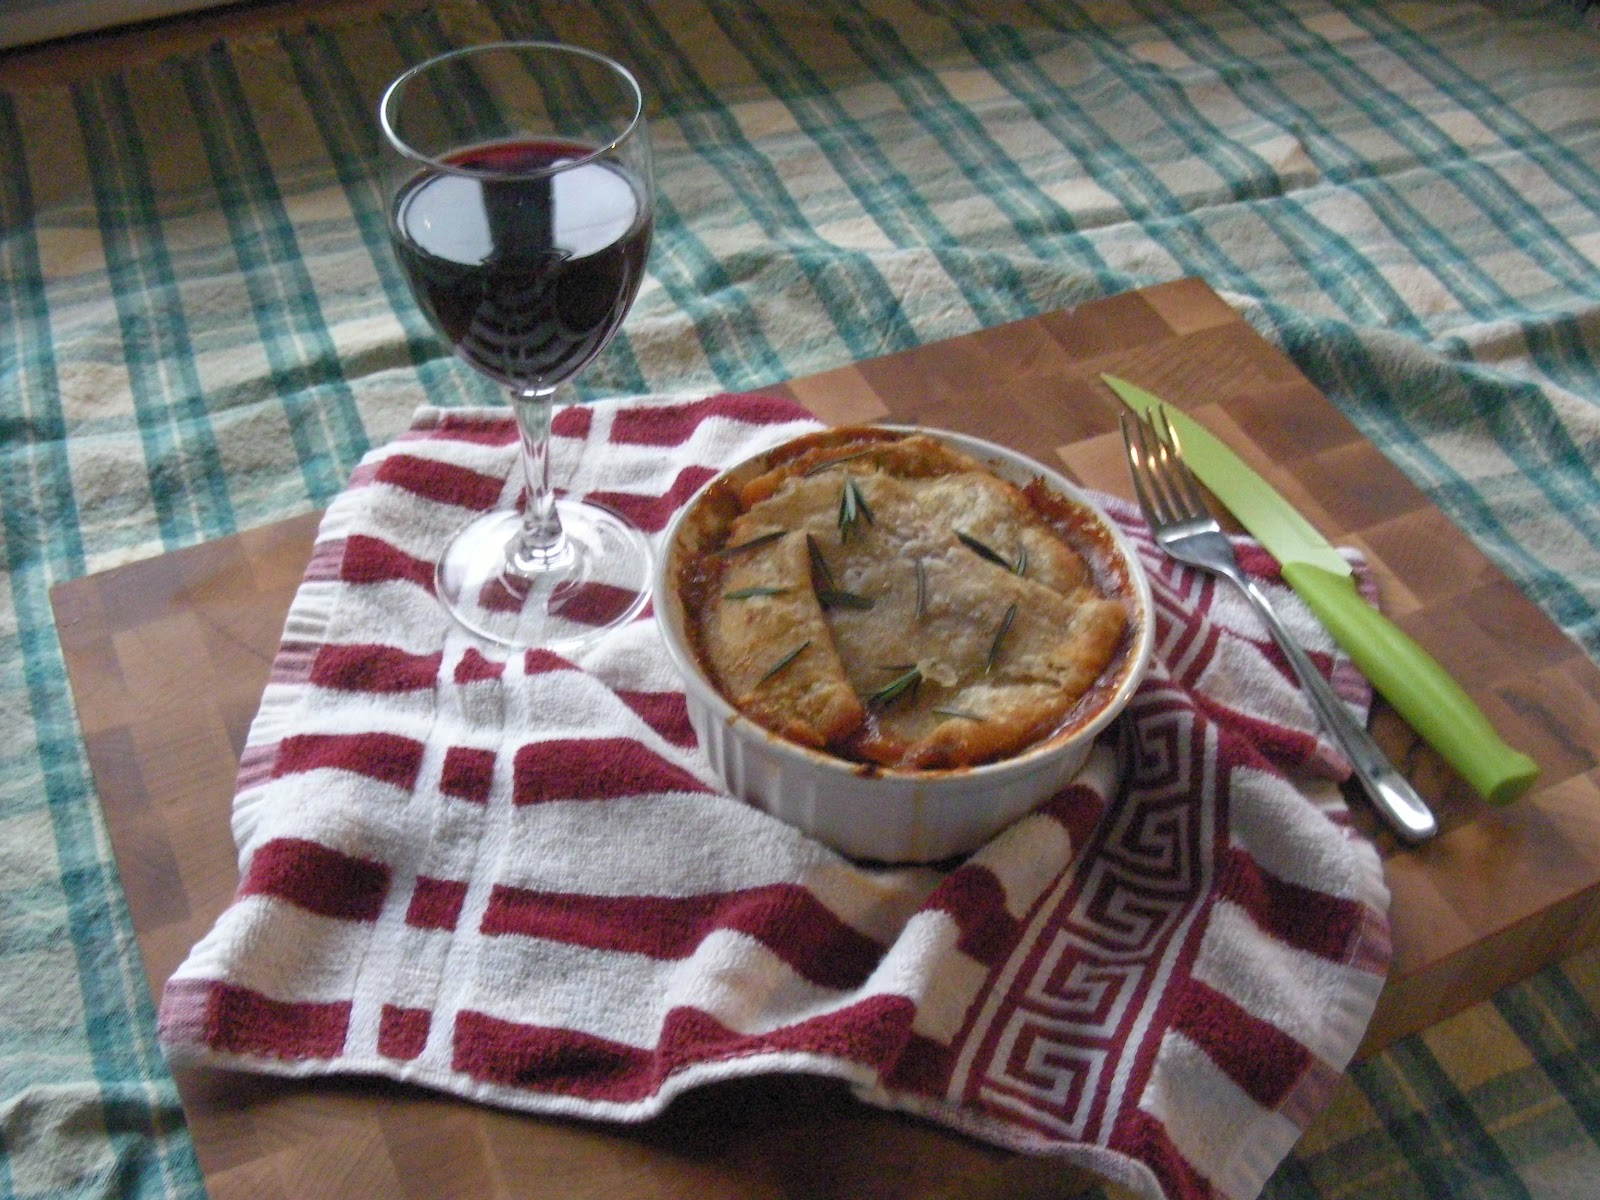
RPI: Hearty Lamb & Fava Bean Pot Pie

The Lowdown:


For Easter we had my favourite meat. Lamb. Enough said. The meal will be discussed in a later post; but for now, all we need to know is that I fled the scene with the leftovers of a beautifully cooked lamb roast. As RPI is due tomorrow I figured tonight would be the best time to do it. Fava beans - check, lamb - check, bottle of wine - check. Now that we have the basics covered we can get to the good stuff. 

I'm a huge fan of traditional British cooking (other than mushy peas). Perhaps it isn't traditional, so lets just say: I'm a big fan of home-style meals. With this in mind, I decided that a lamb and fava bean pot pie would be amazing!  I know traditionally, fava beans go well with liver and a nice chianti (thanks for that tip Mr. Hopkins), but tonight that isn't the case. Tonight is a simple, home-style meal. After all, summer is nearing and nobody will want this type of food until winter. Oh how much I'll miss soups, chilis, and hearty meals. Instead, it'll be boring salads and BBQ. One problem, my stupid strata council doesn't allow BBQs. Ack! Summer cooking is ruined! Ruined I tell you!

Little known fact - if you do not own a rolling pin, a bottle of wine will work wonderfully! I've been cooking for over 10 years now and I still don't own one. Part of me believes that it is solely because after using a bottle to roll, it is perfectly acceptable to drink. Or drink then roll. Whatever works for you I suppose.

Without further ado, here is my ode to home-style cooking!

The Playlist:

Puff Pastry

1 cup Flour, sifted
3/4 cup Butter, room temperature &cut into small cubes
1/2 cup water (more if needed)
Pinch of salt.

Filling

2 lbs Lamb, cubed
2 lbs Fava beans, casings removed.
2 Onions, diced
2 stalks Celery, chopped
2 Carrots, chopped
1 Yam, cubed
1 Potato, cubed
2 Turnips, cubed
1 Parsnip, cubed
1 can Tomato paste
4 cups Beef broth
1 cup dry Red wine
3 dashes Worcestershire sauce
1 tbsp Grainy mustard
1 tsp Cayenne pepper
1 cup Parsley, chopped
1 sprig Rosemary
Salt & Pepper

The Skinny:

  1. Combined flour, salt and butter  into a large mixing bowl and mix. Ensure that each small cube of butter is coated in flour. Then form a well in the centre and add the water slowly, while mixing until it forms a dough ball. Wrap the ball in cling wrap and set it aside in the fridge for 20 minutes.
  2. Flour a surface and kneed the dough ball into a rectangle shape. Using a rolling pin (or bottle of win) in only one direction, roll out the dough into a elongated rectangle. Fold the top 1/3 of the rectangle towards the centre and then fold the bottom 1/3 towards the centre. Rotate 90* and roll the dough into another elongated rectangle. Fold into thirds again, wrap in cling wrap, and set aside in the fridge for an hour (longer if you can). Video instructions are provided here.
  3. Bring a large pot of water to a boil, and add all of the vegetables except for the fava beans and celery with a bullion cube and boil for about 10 minutes. Add the remaining vegetables and boil for another 5 minutes then strain.
  4. Add oil to the same pot and saute the onions and garlic until they start to become translucent. Add the lamb and cook on medium-low for 10 minutes then add the parsley, Worcestershire sauce, rosemary, mustard, wine, cayenne pepper,  and beef broth then cover and simmer for 30-45 minutes on medium-low.
  5. Add tomato paste to thicken. If the lamb filling isn't thick enough add cornstarch into enough water to make a slurry and slowly add the slurry into the lamb until desired consistency, ensuring to mix frequently. I used 2 heaping tbsp of cornstarch in 1 cup of water (I can't remember how much, but it was around there).
  6. Place vegetable mixture into individual oven safe dishes, or into a greased 8x12 dish. Put the lamb mixture on top of the vegetables. Finally, place the crust on the top and pinch the edges around the perimeter of the dish. Brush on olive oil or melted butter if desired. Add slits into the crust so that the inside can "breathe."
  7. Place into a pre-heated oven at 350* for 25 minutes or until pastry is golden brown. Remove from the oven and let set for 10-15 minutes. Serve and enjoy!


Stay rad - H.

Thursday, March 08, 2012

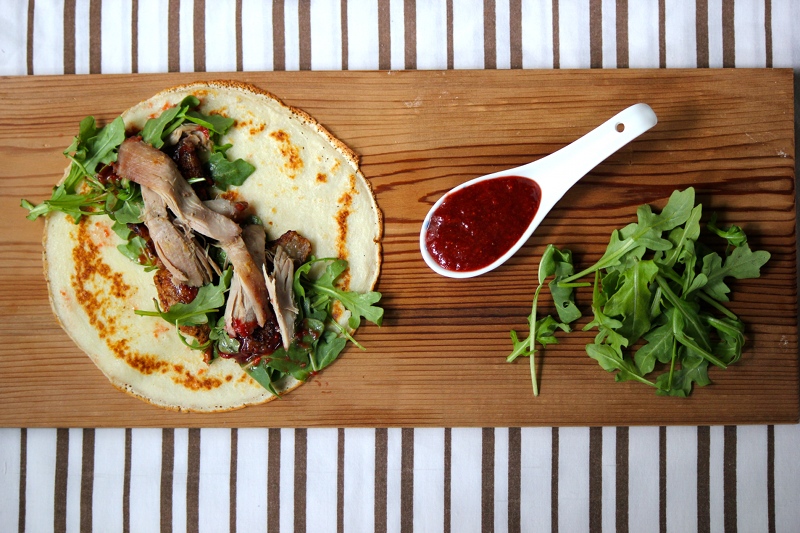
Savory Roast Duck Crepes with Arugula & Stawberry Plum Sauce

Good morning my little sugar bottoms! I have a question for you...

Do you know how to roast a bird?

The usual suspects are turkey or chicken. Simple, traditional, tasty. Chances are your mother or grandmother or someone in the family taught you. Or you can at least remember chowin down on one of these fine creatures on Thanksgiving or Christmas or Easter (assuming you celebrate one or all of these colonial & Christian holidays) or in the case of my family, while camping. Yes, my mother required her camping oven be large enough to fit a full turkey. We really roughed it growing up.


But did you know you can roast duck the same way?  It's a little more work, but not by much. 

I was talking to John the other day and we were both commenting on how easy roasting a duck is but no one seems to do it. No one we know, anyway. It's just not in our cultural repertoire. That being said, there's no reason not to start! 


Now, don't let the cuteness of the little Quack Quacks fool you - their meat is sweet, earthy, moist, and so succulently worth it. Plus you end up with a jar full of duck fat! You think bacon is good, well my friend, duck fat makes everything better. Mmmmmm, duck fat. There's a reason my pants don't fit me anymore. 


FYI: The meat on a duck is limited and one duck typically feeds two very hungry people or three muchie people. Try to find one that's been able to roam and eat what it would naturally and organically - find a happy duck! And then eat him! ...well, maybe kill & cook him first. It's the humanly thing to do.

Savory Roast Duck Crepes with Arugula & Strawberry Plum Sauce


Ingredients for Crepes:

2 C Whole Milk.
4 Large Free-Range Organic Eggs, room temperature.
1 Tbsp Unsalted Butter, room temperature.
1 1/2 C Flour.
1 Tsp Sea Salt.

Ingredients for Sauce:

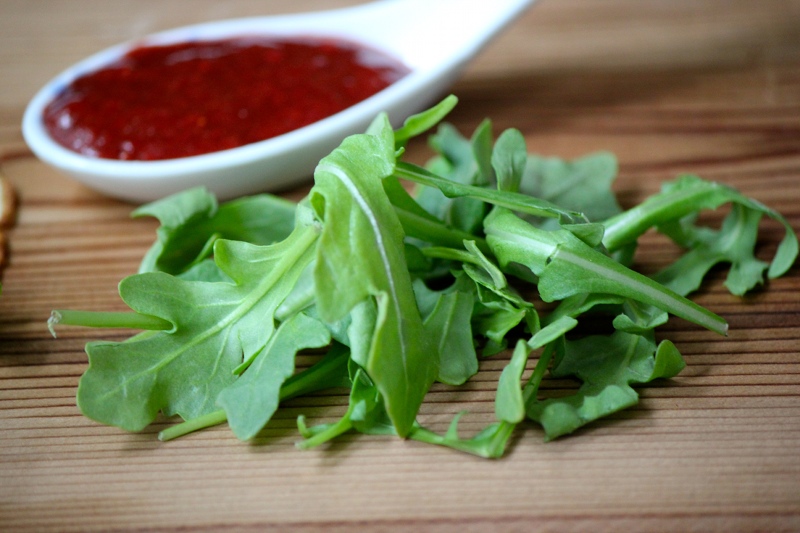
2 C Frozen Strawberries, thawed & drained.
3-4 Plums, pitted (mine were frozen, I thawed & drained them as well).
Zest & Juice of 1 Blood Orange.
2 Tbsp Local Organic Honey.
2 Tbsp Balsamic Reduction.
Kosher Salt & Fresh Cracked Black Pepper.

Other Ingredients:

1 Whole Duck.
1/2 Onion, chopped.
3 Garlic Cloves, peeled & smashed.
1/2 Orange, cut into 2 or 3 pieces.
Kosher Salt & Fresh Cracked Black Pepper.
Fresh Arugula, for topping.

What to Do:

Pre-heat your oven to 300 degrees F.

Meanwhile, remove any giblets inside the duck, rinse well and pat dry with paper towels. Make sure to remove any remaining quills that may have been left behind and cut off any extra flaps of fat. Throw the "other ingredient" onion, garlic and orange inside the duck cavity and season very well with salt and pepper. Lift the little guy up by his legs and shake it around. Now tie the legs together nice and tight with some string (it's called "trussing") and tuck his little arms back underneath him - kind of like if you were to walk up behind someone and try to break their arms.

Place the duck on a wire rack in a large roasting/baking pan. At an angle, gently slice through the skin of the duck to ensure the fat will cook/leak off during the cooking process so you end up with crispy skin. Careful not to cut the meat though - only the fat! 

Using a smaller knife, prick the little guy all over to increase fat drippage. Again, focus on hitting the fat, not the meat. Season the outside with salt and pepper, front and back. Place the duck breast side up on the rack and place in oven. 

Cook 1 hour. Re-prick with small knife. Flip onto the other side. Repeat this step 3 times for a total cooking time of 4 hours.

Turn the heat in the oven up to 400 degrees and cook for a further 15-20 minutes.

By now the skin should be super crispy. Remove from the oven and let sit for about 15 minutes. Then, peel off the skin and meat, reserve, while tossing the bones, stuffed vegetables, etc... Voila! Duck! 

Be careful when cooking duck - they are uber fatty! You can wait for the fat to cool before you dispose of it or you can let it cool slightly, pour it in a jar and stick it in the back of your fridge for roasting potatoes, etc... It's to die for!

For a photo tutorial of this process, click here.

Now, as the duck reaches it's final 40 minutes or so of cooking, you can make the crepes and sauce.

For the sauce, throw everything into a food processor. Blend till smooth. Taste. Add more of whatever you feel is necessary.

For the crepes, add the wet to the wet, the dry to the dry, then combine. Whisk well until batter is smooth & consistent. Heat a small frying pan over medium heat, lightly grease with non-stick spray or butter and drop about 1/3rd a cup or so of the batter into the pan. Swivel the pan in a circular motion to coat the bottom with the batter evenly. Place back on the burner, cook about 1 min or until lightly golden on the bottom and rather solid on top, gently flip, and cook on the other side for about another 30 seconds or so. Remove from the pan, place in a covered baking dish and keep warm until serving.

To serve: take a crepe, chuck on some duck, some arugula, some sauce - roll.


Eat.

Photobucket

This post is linked up with This Chick Cooks; Cast Party Wednesday; Full Plate Thursday; Simple Lives Thursday; Tastetastic Thursday; Fresh Bites Friday; Fight Back Friday; Seasonal Inspiration Saturday; Seasonal Celebration Sunday; Tasty Tuesdays; Slightly Indulgent Tuesday; Tuesday Talent Show; The Hearth & Soul Blog Hop via Premeditated Leftovers.

Thursday, February 09, 2012

Roasted Rosemary Sunchokes + Giveaway!

Good morning lovelies!

I hit 100 followers yesterday on my other blog, Gastronomical Sovereignty! And while I know that followers aren't everything, it sure makes you feel good when someone likes you (or at least your blog) enough to click and publicly display their virtual affection. It's the second best thing to comments.

So to celebrate.... I have a giveaway that I'm sharing both here as well as on the other blog because hey! - I want you to get some cool shit. And lemme tell you, this is one sweet deal of a giveaway; not to mention cost some serious cheddar. Aye! 

So here's the deal. School is coming to an end for me. My immediate reaction to that is, "bring on the wine!"... However, I can't ship wine internationally. And so what's the next best thing after vino for sipping in the middle of the afternoon? Well... at the end of every term John gets me a "Floating Cloud" package from this incredible local spa called Silk Road - essentially, it's a one hour full body massage followed by a one hour facial followed by as much fresh brewed tea as I can possibly consume. This place is the shit. So I'm giving away: tea.... but not just any tea.


I'm giving away 9 incredibly diverse and flavourful different varieties (3 green; 3 black; 3 herbal) of their spectacular tea, each one supplying 7-10 cups per package:


A Scandanavian styled, Finnish made steeper/mug that is super fucking cool:


Some home baked chocolate chip cookies:


And of course... a little reading material. John has put together 10 copies of what could be called my very limited edition, very first cookbook ever. Happy Valentines Day to me, yo! And to you! I'll send you a copy along with the package.


So let's review: 9 types (63-90 cups!) of incredible tea, one amazing tea pot/mug, home baked mother ef'n chocolate chip cookies, and something to pass the time with - my first cookbook. Hellz yeah I did yo! 

To Enter: 
Simply click here and follow the directions!
This giveaway closes February 19th - so get your entries in! The winner will be announced on February 20th.

via magisso

...Okay, onto roasted sunchokes! Because really, who doesn't love roasted sunchokes?? 


Sunchokes - aka Jerusalem artichokes - are related to sunflowers! Funny looking gingeresque tubular little guys (tubular as in like a tube, not like TMNT "totally tubular dude!") taste sort of nutty yet sweet and can be prepared the same way you'd prepare a potato or eaten raw in a salad if you so desire. If eating raw make sure to give them a little lemon bath (lemon jc. and water) to make sure they don't discolor.

When buying, look for non-marked knobbles and store in your vegetable crisper for up to two weeks. If I were you, I'd leave the skin on when preparing because their knobbliness (is that a word?) is a bitch to get around. Just scrub well before cooking. 


Seriously! Try them! They're fantastic! And roasting them in the oven with a bit of garlic and rosemary (oooh! or duck fat!) makes a different yet scrumptious addition to any meal. Well, maybe not any meal. I find it hard to imagine that sunchokes would fare very well with these.

Roasted Rosemary Sunchokes


Ingredients: 

1 to 2 Lbs of Sunchokes, scrubbed clean, well dried, and chopped into 1" pieces.
5 Cloves Garlic, peeled.
2 Sprigs of Rosemary, finely chopped.
1 Lemon for Juice.
Extra Virgin Olive Oil.
Kosher Salt & Fresh Cracked Black Pepper.

What to Do:

Pre-heat your oven to 375 degrees F.

In a baking pan or two, toss the sunchokes, garlic and rosemary with a Tbsp or two of olive oil, lemon juice, and season well with salt and pepper.


Arrange in a single layer in the pan(s) and roast in heated oven for 30-45 minutes or until desired tenderness is achieved.

Remove from the oven and serve.

Eat!


Photobucket

This post is linked up with Tasty Tuesdays; Slightly Indulgent Tuesday; Tuesday Talent Show; This Chick Cooks; Cast Party Wednesday; Simple Lives Thursday; Full Plate Thursday; Tastetastic Thursday; Fight Back Friday; The Gallery of Favorites via the 21st Century Housewife; Fresh Bites Friday; Seasonal Inspiration Saturday; Seasonal Celebration Sunday.