Showing posts with label Vegetables. Show all posts

Thursday, December 20, 2012

Scalloped Potatoes

There are few things I love more than potatoes. I think that's the Albertan in me. I have a special fondness in my little heart for those bad boys.


It's been a long time since I've lived in Calgary, Alberta. In that time I've developed a raging affinity for other foods: pasta, polenta, homemade tomato sauce, chicken liver pate, cheese, wine. In fact, I often think my food-soul is Italian. 

And I have mostly managed to shake a lot of the Albertanisms that make me think of it as "little Texas" - big money, greed, Budweiser, big oil guzzling trucks, saying "get 'er done". Not that there is anything wrong with Alberta or Texas in and of themselves - I'm just a little more West coast than that. Or as the people I work with often refer to me, a little more social-communist. And I'm okay with that. I like shopping vintage thrift and up-cycling material goods. Smart cars are an excellent way to get around the city. And sauntering from one place to another, taking time to smell the flowers and breathe the air and watch the birds and lay on the beach all while being protected by universal medicine is A-okay with me.


But try as I might - potatoes linger both in my mind and judging by the popularity of the Paleo diet, my hips too, apparently.  Smother 'em in cheesy, creamy goodness and I've got the best of all worlds.

So while Italian may be my food-soul, potatoes are my soul-food. They remind me that I stem from a meat and potatoes kinda place. Filled with big trucks, oil money and bad beer. So I hold them dear and close to my heart. That and country music.

Scalloped Potatoes
(printable recipe) - serves 4.


Ingredients:

Approx 3 Lb (6 medium sized) Yukon gold Potatoes, sliced very thinly (use a mandolin on thinnest setting).
1 Onion, peeled & sliced very thinly in the same way as the potatoes.
2 Garlic Cloves, minced.
1 or 2 Sprigs of Fresh Thyme.
1 Bay Leaf.
2 1/2 C 2% Milk or Cream.
2 Tbsp Butter.
2 Tbsp Flour.
Pinch of Nutmeg.
1 1/2 C Gruyere Cheese, grated.
1/2 C Parmesan Cheese, grated.
Coarse Sea Salt & Fresh Cracked Black Pepper.

What to Do:

Pre-heat your oven to 400 degrees F & lightly grease a 9 X 9" baking dish.

Heat a medium sized saucepan over medium heat. Add the butter and melt until sizzling - add the flour and stir constantly until fragrant and just starting to change color. Remove from the heat and add the milk, stirring to ensure it doesn't curdle. Add the garlic, thyme, bay leaf, nutmeg and a generous helping of salt and pepper. Place back on heat and stir stir stir until the milk thickens. Remove from the heat and discard what's left of the thyme stem.

Ladle a little of the liquid into the prepared baking dish, followed by closely layered slices of potatoes so they overlap. Top with some of the grated Gruyere and another ladle full of the milk mixture. Repeat until the dish is full with 1/2" of headroom - you should end up with 3 - 4 layers of potatoes, finishing with the Parmesan cheese.

Cover with tin foil and place in the oven to bake for 50 - 60 minutes. Remove the cover and continue cooking for a further 10 minutes or until cheese on top is bubbly and golden.

Remove from the oven and let sit for a few minutes before cutting into. 

Eat.


What's your background? What foods or lifestyle choices do you hold close to your heart? What makes you who you are? What do you hang on to? What do you let go of? Are there any other country fans in the house?


Photobucket

Thursday, December 13, 2012

RPI Eggs: Super Simple Poached Egg Sunday Breakfast

Happy Thursday darlings!


The best part of my day? I logged into Blogger, checked the blog's stats for the day, and opened up my draft for RPI Mission Eggs... I was greeted by this:

Jingle bells, batman smells, Robin laid an egg.
Batmobile lost a wheel and Joker got away.

Oh the joy of sharing a blog with a close friend who you wished lived closer. I've heard this song eight million times and was always kind of annoyed by it. Until now. Now it's the endearing gentle message my dear friend Haydn left me in my draft copy of RPI Eggs - a small but significant message that he hopelessly misses me. I miss you too, Haydn. Stupid, giant, Canadian country.

Something else that is dear to my heart? Eggs. Particularly, super simple Sunday breakfast eggs. When we established eggs as our Rock, Paper, ingredient mission this month, my mind immediately started digging into the various culinary fascinations of eggs - custards, cakes, aioli, souffle, blah blah blah. Ultimately, I chose to showcase the true nature of the protein powerhouse known as the egg. And stayed true to chicken.

Small side note: Duck eggs scare the squeezebox outta me. Much too large. Much. too. large. Pretty much anything that is larger in size than the average/normal freaks me out.

All you need for this recipe: eggs, bread, left over veggies. Maybe a little cheese. Golden. 

Super Simple Poached Egg Breakfast
(printable recipe) - serves 2.


Ingredients:

4 Pastured Eggs.
1 Tsp Vinegar.
1 Bunch Kale or Chard.
1/3 C Chicken or Veggie Stock.
2 Pieces Baguette or Sourdough Loaf, cut on an angle.
2 Shavings of Salty Grainy Cheese (ie Grana Padano, Parmesan, Pecorino Romano)
Extra Virgin Olive Oil.
Coarse Sea Salt & Fresh Cracked Black Pepper.

What to Do:

Pre-heat your oven to a high broil. Once hot, place sliced bread on a baking sheet, brushed lightly with olive oil, and slide under heat. Broil until golden. Remove from oven and lay the cheese on warm toast. Set aside.

Turn the oven down to 400 degrees F. Re-heat winter veg in oven until hot. 

Heat 2 Tbsp of oil over medium heat in a large saute pan. Once hot, throw in the greens, season well with salt and pepper and stir well to coat. Add the stock and while stirring often, allow the greens to cook through and the stock to evaporate.

To poach eggs: Bring a deep saute pan of salted water to a light boil over medium-high heat. Once the water starts to bubble, add vinegar. Crack eggs into individual bowls and gently slide into the semi-boiling water. Using a slotted spoon, corral the whites around the yolks to help them keep their shape. Cook for about 3-4 minutes or until the egg whites are cooked through and the yolks runny. Remove from water and gently place eggs on top of cheesy toast.

Throw it all on a plate and chow down my friends, chow down.

Yes - eat.


How do your friends let you know they love you? How do you show you love them?


Photobucket

Wednesday, December 05, 2012

Salads Ain't Just Fo' Summer Yo!

There are plenty of splendid and flavorful ingredients that can be used to make some pretty stellar Winter ones. Who needs mass produced & globally shipped lettuce when you can use locally and organically grown kale? Mmmm-mmmm - Christmas Winter salads are a wee bit of yum, yes?


I know, I know.

I promise that every post I do here up until Christmas will not be Christmas related.

To be fair though, this dish really isn't about Christmas. It's about using your Winter veg up effectively and let's be honest: Sometimes it's friggin difficult to find a fresh way to use those beets. Or leafy greens.


There comes a point, in every CSA participant's box, when we think "for the love of all that is good and holy - if I get one more (insert bastard vegetable here), I'm going to kill myself!". For me, that's usually kohlrabi. For John, it's turnips. Thence this recipe.

The fact that this dish is white, green and red just happens to make it an excellent side to a holiday meal. I promise, it's not Christmas.

Beet Carpaccio & Massaged Kale Winter Salad
(printable recipe) - serves 2.


Ingredients for Salad:

6 Small Red Beets, scrubbed and well dried.
6 Small Golden Beets, scrubbed and well dried.
1 Bunch Kale.
6 Oz Goat Cheese, room temperature.
Handful of Sweet & Spicy Nuts.
Coarse Salt & Fresh Cracked Black Pepper.

Ingredients for Dressing:

1/2 C Good Quality Extra Virgin Olive Oil.
The Juice of 1 Orange.
1 Tbsp Good Quality Balsamic Vinegar.
Coarse Salt & Fresh Cracked Black Pepper.

What to Do:

Pre-heat your oven to 400 degrees F. Place the golden beets in one roasting pan and the red beets in another. Drizzle both with olive oil and season well with salt and pepper. Cover and roast in the oven for 40 - 60 minutes, depending on the size and age of the beets. When a fork slides gently into the beet, they're done. Remove from the oven and set aside until you can touch them. Chop off the top, peel the skins off and discard and place beets in the fridge until cool.

Meanwhile: remove the stem/rib of the kale and then chop into thin sliced. Massage - yes, massage - until the kale becomes soft and edible. This can take a while so just plop down in front of the tv if you want and rub baby rub. Set aside.

Make the dressing: Dump all the ingredients into a mason jar and shake. Set aside.

Once the beets are cool, use your mandolin to slice them on the thinnest setting. Watch your fingers! You can do this with a knife but it will take longer and it will be difficult to be as consistent. Make sure you do all the golden ones before the red or you will discolor the delicate gold beets with purple.

Lay the red beets on a plate, slightly overlapping the edges until the plate is full. Slide gold slices so they lay just slightly under each red beet. 

In a bowl, dress the kale with some of the dressing and the goat cheese. Gently place on top of the beets and finish with some nuts.  Season lightly with salt and pepper.

Eat.


How do you feel about Winter salads? Have you ever massaged kale? What do you get in your CSA that makes your little heart happy? Angry? Confused?


Photobucket

Thursday, October 18, 2012

RPI: Chorizo Potato Boats (choo choo!)

Oh goodness!

I find it so amusing that Haydn and I both - inadvertently - chose childhood favorites for our chorizo RPI assignments. Great minds think alike!


Okay, maybe not so much childhood as teenage/young adult-ness. And while we're at it, maybe not so much great minds either. When I still lived in the the small-ass town where I grew up (think no-where Alberta), bumper-skiing and Budweiser were cool, gas was $5.00/litre and gettin' down on the farm (literally) was how we got down - bonfires, pickup trucks and all.

One night a week my friends and I would cruise - and by cruise, I mean see if we could break the sound barrier in my girl friend's volvo - into the city and hit up Boston Pizza for late night snacks and cokes. And if we felt really adventurous, some of us would even get long island iced-teas - the drink of all barely-legal kids everywhere. 


One of those snacks was potato skins. Oozy gooey semi-veggie friendly potato boats of unhealthy goodness. Well I'll tell ya what - I did them one better. I kept most of the potato, smashed it up with a little milk, butter and sour cream and then mixed in some seriously flavorful additions.

I give you, chorizo potato boats. All aboard!

Chorizo Potato Boats
serves 4 - (printable recipe)


Ingredients:

2 Large Russet Potatoes, washed and well dried.
3 Links of Spanish Chorizo, casing removed.
1/2 Onion, peeled & finely diced.
1 Garlic Clove, peeled & chopped.
Handful of canned/jar Artichoke Hearts, roughly chopped.
2 - 4 Sundried Tomatoes (depending on size), roughly chopped.
1 Roasted Bell Pepper, thinly sliced.
1/4 C Black Olives, pits removed and roughly chopped.
1/2 C Aged White Cheddar Cheese (or other flavorful good melting cheese), grated.
Smoked Paprika for dusting.
Approx 1/2 C Milk.
2 Tbsp Sour Cream + Extra for serving.
2 Tbsp Butter + Extra for serving.
2 Tbsp Fresh Italian Flat Leaf Parsley, chopped.
Coarse Sea Salt & Fresh Cracked Black Pepper.

What to Do:

Pre-heat your oven to 425 degrees F. 

As the oven heats, stab the potatoes with a fork all over to ensure they don't explode in the oven. Place on a baking sheet and and bake in the oven for 1 - 1 and 1/2 hours or until fork tender. Remove from heat and let cool enough so you can handle them.

While the potatoes are cooling heat a large frying pan over medium heat. Add the chorizo and break up well. Cook thoroughly, stirring often. 

Add the onion - allow to soften. Toss in the garlic, stirring for about a minute or until fragrant. Toss in the artichoke hearts, tomatoes, bell pepper and olives. Mix well and heat through. Set aside.

Once they have cooled somewhat, slice in half and spoon the inside of the potato out of the skin and dump in a bowl. Add 1/4 C of the milk, butter and sour cream along with a good helping of salt and pepper. Mash baby mash! If necessary, add more of any of the above to taste and find a good texture. Take care not to over mash because over mashing = starchy goopy mess.

Fold in the chorizo veg mixture as well as the cheese until well blended. 

Gently spoon the potato mixture back into the skins. Pile high. And set back onto baking sheet. Sprinkle with smokey paprika. Place back in oven for about 30 minutes.

Remove from heat. Top with the chopped parlsey. Serve.

Eat.


What kind of "trouble" did you get into growing up? What were some of your favorite dishes?


Photobucket

 This post is linked up with the Hearth & Soul Blog Hop via the 21st Century Housewife; Tasty Tuesdays; Tuesday Talent Show; Cast Party Wednesday; Whole Foods Wednesday; Frugal days, Sustainable Ways; What's in the Box;

Thursday, August 23, 2012

Rippin' Another Blog: Sweetly Serendipity

Who doesn't love a good - and I mean good - side dish?

I've been saying for years that I think it's the sign of a good chef who can lovingly make the side dish as interesting, flavorful, and delectable as the main. 


And you know what? .....Taryn @ Sweetly Serendipity is a pro. Not to mention an awesome super babe. Hey - when a girl can make vegetables taste the way she did, a girl's gotta butter her up. Besides, how else am I gonna talk her into coming to Victoria to cook me dinner?


...Starting this week, "Post from Another Blog" posts are going to be a little different around here. Instead of simply (and separately) picking a recipe from any old blog we felt like, Haydn and I are taking turns choosing a blog from which we will both select a recipe from and see what we come up with. Will we choose the same recipe? Will we choose different ones? The suspense is killing me! Okay, maybe not. But I think it'll be more interesting, yes?


So for this week's blog, we're taking on Taryn. I chose Taryn because I know her from The Secret Recipe Club and after having made her fabulous rice pudding, I felt like the woman and her blog deserved more props because as I said earlier, she's kind of awesome.

And this time around, just as the first, she did not disappoint. I only have 3 words for you: Summer. Vegetable. Gratin.

The crunchyness of the breadcrumby salty Parmesan, sweetness of the caramelized onions, delicateness of the Summer friendly squash, and acidity from the tomatoes made this a highly enjoyable side that I plan on making again. For reals. Thank you Taryn darling!

Summer Vegetable Gratin
(printable recipe) - serves 4.


Ingredients:

1 Lb Zucchini, sliced into 1/4" thick rounds.
1 Lb Yellow Zucchini, sliced into 1/4" thick rounds.
3-4 Large Ripe Tomatoes, sliced 1/4" thick.
2 Medium Onions, halved and sliced thin (approx. 3 cups).
2 Medium Sized Garlic Cloves, minced.
1 Tbsp Fresh Thyme, stemmed and chopped.
6 Tbsp Extra Virgin Olive Oil.
1 Handful Fresh Basil Leaves, chopped or roughly torn.
1 C Panko Crumbs.
1 C Parmesan Cheese, grated.
Coarse Sea Salt and Fresh Cracked Black Pepper.
Extra Virgin Olive Oil.

What to Do:

Toss the zucchini in a colander with a good helping of salt. Let sit for about 45 minutes and drain well - you may want to pat dry with a tea towel to remove excess moisture. 

In a separate colander (or lay on a towel on the counter) - do the same with the tomatoes. 
As your veggies de-moisturize, heat a couple Tbsp of oil in a large saute pan over medium heat. Once hot, add the onions. Stir well. Turn the heat down to medium-low and slowly caramelize them, stirring every few minutes or so until dark golden brown. Remove from the heat and set aside.

Pre-heat your oven to 400 degrees F and spray a 9 X 9" baking dish with non-stick spray.

As the oven heats, combine the garlic, 3 Tbsp of oil, a good helping of pepper and thyme in a mixing bowl. Add the zucchini and toss well to coat.

Pour the entire zucchini bowl into the prepared baking dish, topping with the onions and finishing off with the tomatoes, overlapping just slightly.

Place in the oven and bake 40-45 minutes or until the tomatoes are pulling away from the sides of the dish and the edges are just starting to brown.

In a bowl, mix together the panko, parmesan and a Tbsp of oil. Remove the dish from the oven, turn the heat up to 450 degrees and top with this mixture. When the oven is ready, place back inside and allow the top to brown and crust (approx 5-10 minutes). 

Remove from the oven, top with the basil, and serve.

Eat.


What's your favorite part of a meal? Appeteaser? Main? Side? Dessert? The alcohol?


Photobucket

This post is linked up with Cast Party Wednesday; Whole Foods Wednesday; Frugal Days, Sustainable Ways; The Wednesday Fresh Foods Blog Hop; Showcase Your Talent Thursday; Keep it Real Thursdays; Full Plate Thursday; Tastetastic Thursday;

Wednesday, August 15, 2012

Thirsty much? Watermelon Salad = Good

Happy Thursday morning to you darling readers!

When you think of Summer, what comes to mind?...


Lazy days on the beach? Coronas* on a patio? Music festivals up the ying yang? (if there was a music festival up my ying yang I'd have one thing to say, and one thing only... "ouch").

Aside from the above, along with tomatoes, flip flops, and camping, Summer to me means watermelon!


I think it stems from my childhood. I distinctly remember sitting at picnic tables as a young'n with the sun smiling down at us, giant slice of watermelon in one hand, way messed up napkin in the other, spitting seeds directly out onto the grass beneath our feet. Those were the days. The days of Summer when the biggest responsibility you had was making sure the dishes you had to dry after dinner weren't still sopping wet when you put them away in the camper. Oh yeah, and watermelons still had seeds! 

I know it wasn't the classiest of endeavors - eating a watermelon. Bite, chew, spit. But it was fun. And the watermelons weren't franken-fucking-scary engineered products of some group of men hidden away in Monsanto's windowless labs. That being said, I still eat me some tasty watermelon from time to time and after the experience I referred to in this post, this dish just had to be done.

Watermelon Salad with Fresh Mozzarella & Marcona Almonds
(printable recipe) - Serves 4.


Ingredients:

4 C Chopped Watermelon, 1" pieces, refrigerated & cold.
1 Ball Fresh Buffalo Mozzarella (If you can get your hands on Burrata, sub that), drained & roughly torn.
Small Handful of Marcona Almonds, lightly toasted.
Small Handful Fresh Basil.
1 C Creme Fraiche.
4 Tbsp Local Organic Honey.
Coarse Sea Salt.

What to Do:

First, toss the watermelon with a good pinch of salt and place back in the fridge until ready to use.
Next, mix the creme fraiche and the honey together in a bowl until well blended. Adjust to taste. You want it fresh yet slightly sweet.

Lastly, drizzle or spoon the dressing onto a plate, topping with the rest of the ingredients, finishing with the torn mozzarella (or beautiful burrata) and basil.

And that's it!

Eat.

When you think of Summer, what comes to mind?

Photobucket

*I am well aware that Corona is a terrible beer and not original at all. That being said, I can hardly think of anything I'd rather have whilst camping, laying on a beach, or hiding in the back of my shoe closet** - the only place in my house that really feels cool when it's 35 degrees outside.

**I wish I had a shoe closet. What I really have is a shelf very much in need of a good dusting that has been kind enough to begrudgingly allow me to wedge it in between my collection of under-used hand bags and a skateboard that hasn't been ridden in 4 years. I don't actually sit in there.

This post is linked up with Cast Party Wednesday; Whole Foods Wednesday; Frugal Days, Sustainable Ways; The Wednesday Fresh Foods Blog Hop; Tastetastic Thursday; Full Plate Thursday; Showcase Your Talent Thursday; Keep it Real Thursdays; Foodie Friday; Fight Back Friday; Fresh Bites Friday; Wellness Weekend.

Wednesday, July 11, 2012

Cactus Jelly Bourbon'd Bacon Tacos

Good morning to you darlings!

So if you follow me @ Gastronomical Sovereignty, you may know I take part in this little thing called Foodie Pen Pals... And by little, I mean gargantuan. It's over 1000 members strong and each month we swap packages all around the world just stuffed with incredible food stuffs. It really is amazing to have so many food bloggers, non-food-blogger bloggers and blog readers connect over such vast distances!


This past month a woman named Tenecia had me as her assignee. You can read more about her here or check out her blog, Boobs, Barbells and Broccoli. One of the things she sent me was a locally crafted Cactus Apple Jelly. 

Um, first response: heck yeah! 

And my second response: what the ef is cactus apple jelly?


Now, the average person might spread that baby on some whole wheat toast, or a sesame seed bagel maybe, or if they were feeling really adventurous... dare i say, some homemade, from-scratch pancakes...? Oooooh, that's living on the edge!

But I'm no ordinary person. And neither is Tenecia. I wanted to do abnormality justice damn it!

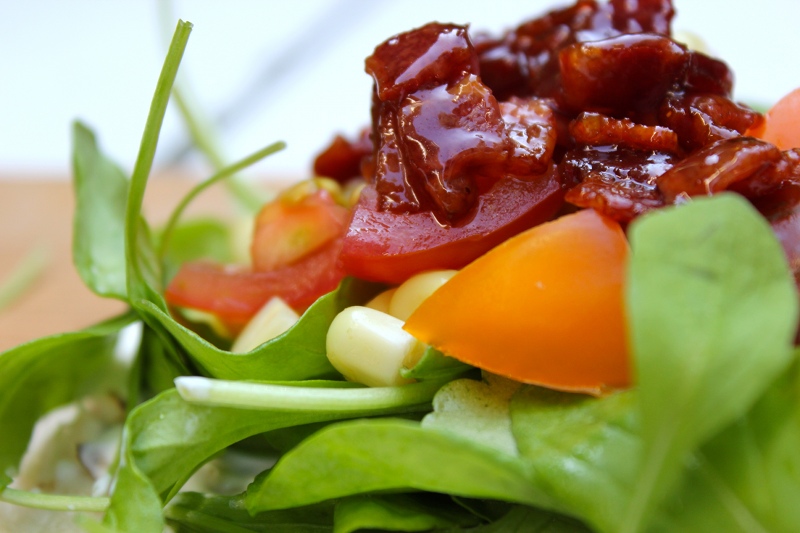
Instead, I threw a good half jar into a small saucepan, reduced it down with a 'lil bourbon - because we all know bourbon makes everything better - and then used it as a glaze...for bacon.


Because if bourbon doesn't make everything better, bacon sure does. Mmmmm bacon... err bourbon... uhhh bourbony bacon.... mrraaaawwwwlllll.... (that's drooling in type form).

Tenecia also included a package of hand made tortillas from her area so what else could I possibly make besides cactus jelly bourbon'd bacon tacos?

Cactus Jelly Bourbon'd Bacon Tacos
(printable recipe) - serves 8 as an appetizer or 4 as a main.


Ingredients:
1 Lb. Happy Bacon, chopped.
8 Oz. Cactus Apple Jelly (though regular apple jelly would suffice).
1 Oz. Bourbon.
Handful or Two of Fresh Arugula.
1 Ear of Fresh Corn.
1 Pint Fresh Tomatoes.
Some Sour Cream (for serving).
8 Organic Corn or Flour Tortillas.

What to Do:

Place a pot of water over high heat and bring to a boil. Add the corn and allow to cook until tender. If it's fresh from the farmer's market it will cook much faster (approx 3 minutes); if it's store bought, hang on for 7-10. Drain, allow to cool to touch and then using a steak knife, saw the kernels off the cob. Set aside. 

As the corn cooks, dice the tomatoes and wash and dry the arugula. Sprinkle both lightly with salt and toss the arugula with a touch of good quality olive oil.

Place a large frying pan over medium-low heat. When hot, gently and carefully place the bacon in the pan. Cook until crispy, flipping half way through - be careful! The grease is a hot one! Drain on a paper towel lined plate and set aside. 

Turn your oven to 300 degrees F. Gently heat the taco shells as you finish the recipe. Alternatively, you could do this in a microwave for 60 seconds with the tortillas wrapped in a towel.

Wipe out the pan and add the jelly and bourbon, Reduce until relatively thick and sticky. As it cools it will get thicker. If it gets too thick, just reheat.

Add the bacon and stir well.

Throw all the ingredients into separate bowls and build your tacos...then...fill up your glass with one of these...and....

Eat!

What gets your creative motor running? What inspires you?


This post is linked up with Cast Party Wednesday; Whole Foods Wednesday @ This Chick Cooks; Whole Food Wednesdays @ Beyond the Peel; Frugal Days, Sustainable Ways; Showcase Your Talent Thursday; Full Plate Thursday; Tastetastic Thursday; Foodie Friday; Fight Back Friday; Fresh Bites Friday.

Wednesday, June 20, 2012

I like it hot and cheesy!

I've missed you lovelies!


Due to a ridiculously busy week of also family visitations, work schedule fuck ups, Haydn's birthday, university convocation, hair appointments, and the need to finish the last book in The Hunger Games, I took last week off. And you know that? I'm damn glad I did!


It just needed to be done. 


Those of us with blogs know how time consuming they can be, but my wonderful friends who aren't obsessed with their computers don't realize that between 3 posts a week @ Gastronomical Sovereignty and 1 here, I probably waste spend near 40 hours a week cooking, taking photos, editing photos, posting, promoting, and doing general blog things. It really is about 10 hours a post - and while I love it, I needed a week off. 


But now I'm back! And that also feels damn good.


And to celebrate? How about a little cheesy spicy goodness? For this week's make-something-from-another-blog-post I decided to pull out a little trick from Kimberly @ Rhubarb & Honey.


The chick is fuckin' rad and so is her food philosophy. She also happens to partake in The Secret Recipe Club with me - and while I may not get as my SRC assignment, it doesn't mean I can't give the woman props and make something from her blog.


Her recipe has less fat in it than mine does but I have a slight fear of anything "low fat" or "non-fat".... If they take the fat out of an ingredient, they have to replace it with something. What is that something??? Ick! So instead, I went all-fat. And let me tell you, I'm pretty sure my thighs are feelin' it. But it's all good because anything that is cheesy and spicy makes me a happy girl... 

Speaking of which, have you read 50 Shades of Grey??? I'm on the first book right now and I've never read anything so outright cheesy and hot in all my life. But it's Summer time - when else during the year can you indulge in such sauciness?

Gooey Cheesy Baked Jalapenos
 (printable recipe) - serves 5 - 6.


Ingredients:

6 Jalapeños, halved and seeds & ribs removed.
1/2 Cup Cheddar Cheese, grated.
1/4 C Cream Cheese, whipped.
4 Scallions, finely chopped.
1/2 Cup Whole Wheat Flour.
1 1/2 Cups Panko Crumbs.
4 Large Egg Whites.
Course Sea Salt & Fresh Cracked Black Pepper.
1/2 C Sour Cream.

What to Do: 

Pre-heat your broiler and line a baking sheet with aluminum foil. Place a wire rack on top and lay jalapenos on rack, broil for approx 2 minutes or until they start to char. Allow to cool completely and turn the oven down to 400 degrees F via the regular element.

In a small bowl combine the cheddar, cream cheese and half the scallions. Gently spoon & tightly pack into eat half pepper.

Place the flour and panko crumbs in two separate shallow dishes, seasoning both with a little salt. In a third bowl, whisk the egg whites until foamy.

Dredge each jalapeno through the flour,s haking off the excess, followed by the egg whites, and then the panko.

Place back on the wire rack/foil lined baking sheet again and season with salt and pepper. Bake until breading is golden and cheese is melted, approx. 20 minutes or so.

As they brown, mix the remaining scallions into the sour cream and season lightly with salt.

Serve baked jalapenos with the sour cream on the side for dipping.

Eat.

What do you do to relax? How do you know it's time for a break? Good Summer read suggestions, darlings?


 Photobucket

This post is linked up with Whole Foods Wednesday; Frugal Days, Sustainable Ways; Cast Party Wednesday; Simple Lives Thursday; Showcase Your Talent Thursday; Full Plate Thursday; Tastetastic Thursday; Fresh Bites Friday; Fight Back Friday.

Tuesday, April 10, 2012

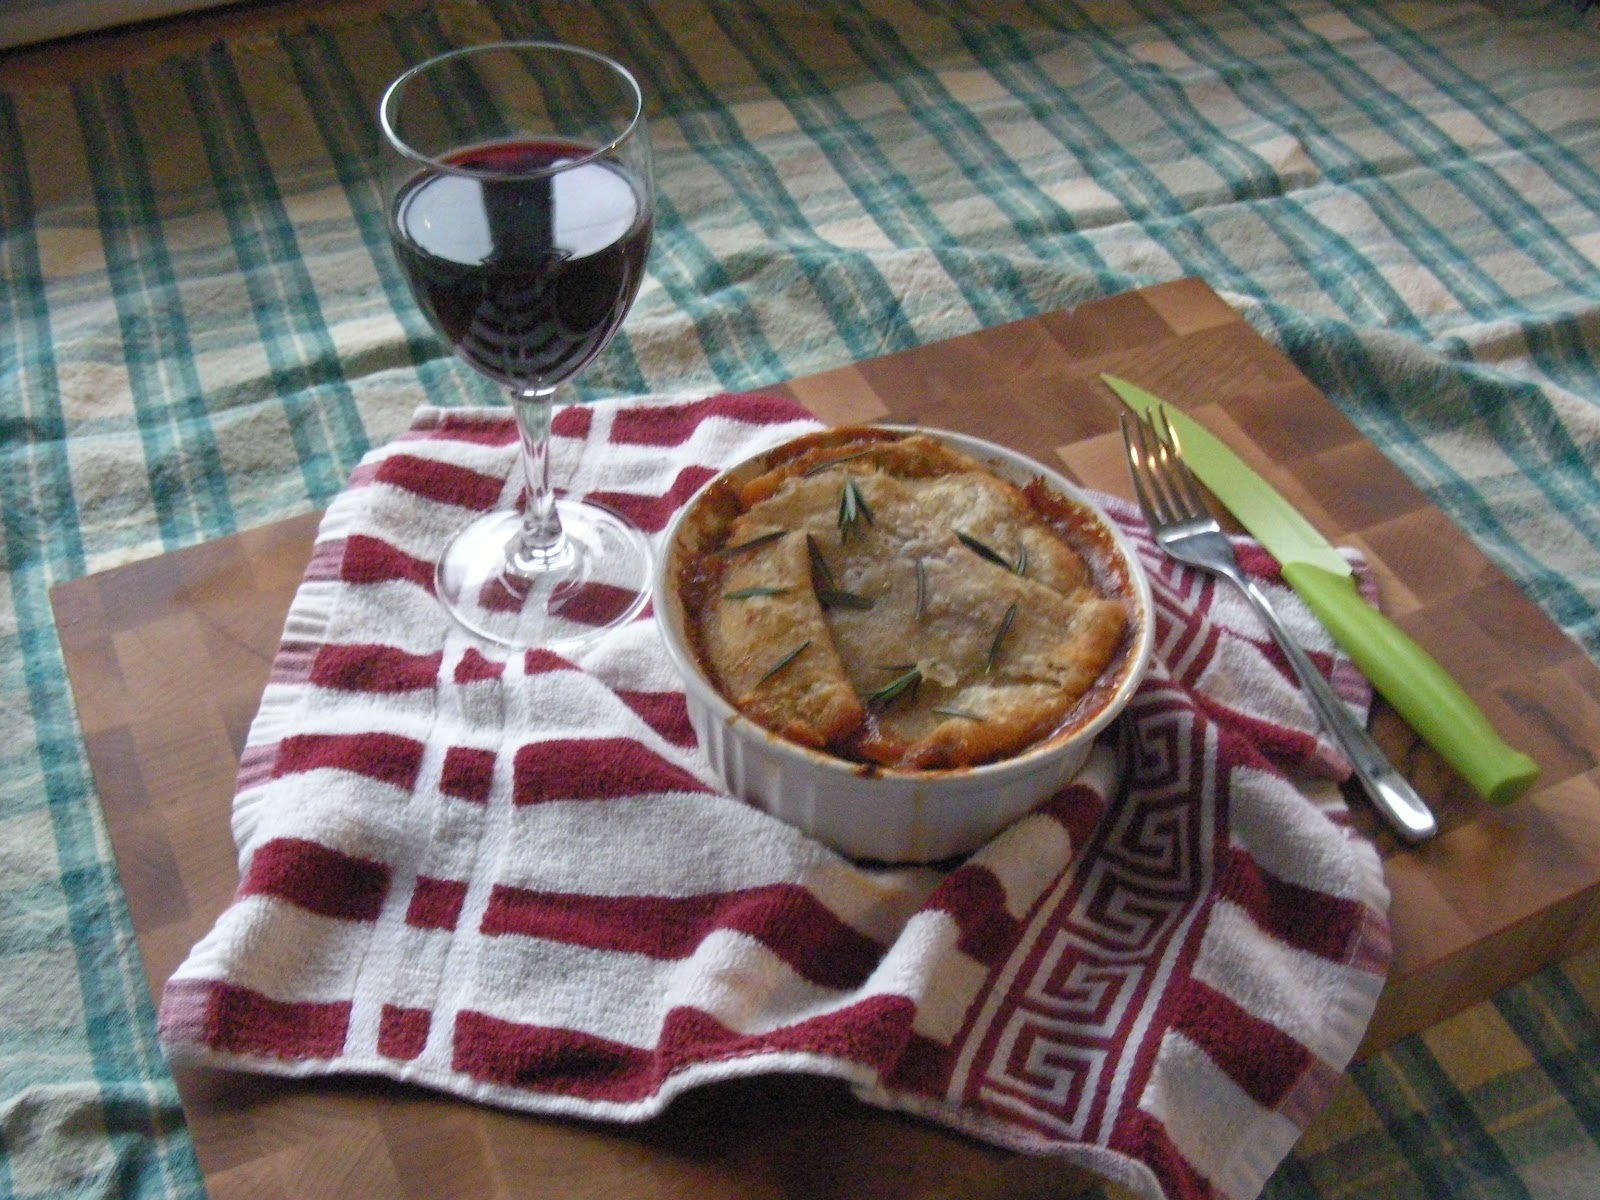
RPI: Hearty Lamb & Fava Bean Pot Pie

The Lowdown:


For Easter we had my favourite meat. Lamb. Enough said. The meal will be discussed in a later post; but for now, all we need to know is that I fled the scene with the leftovers of a beautifully cooked lamb roast. As RPI is due tomorrow I figured tonight would be the best time to do it. Fava beans - check, lamb - check, bottle of wine - check. Now that we have the basics covered we can get to the good stuff. 

I'm a huge fan of traditional British cooking (other than mushy peas). Perhaps it isn't traditional, so lets just say: I'm a big fan of home-style meals. With this in mind, I decided that a lamb and fava bean pot pie would be amazing!  I know traditionally, fava beans go well with liver and a nice chianti (thanks for that tip Mr. Hopkins), but tonight that isn't the case. Tonight is a simple, home-style meal. After all, summer is nearing and nobody will want this type of food until winter. Oh how much I'll miss soups, chilis, and hearty meals. Instead, it'll be boring salads and BBQ. One problem, my stupid strata council doesn't allow BBQs. Ack! Summer cooking is ruined! Ruined I tell you!

Little known fact - if you do not own a rolling pin, a bottle of wine will work wonderfully! I've been cooking for over 10 years now and I still don't own one. Part of me believes that it is solely because after using a bottle to roll, it is perfectly acceptable to drink. Or drink then roll. Whatever works for you I suppose.

Without further ado, here is my ode to home-style cooking!

The Playlist:

Puff Pastry

1 cup Flour, sifted
3/4 cup Butter, room temperature &cut into small cubes
1/2 cup water (more if needed)
Pinch of salt.

Filling

2 lbs Lamb, cubed
2 lbs Fava beans, casings removed.
2 Onions, diced
2 stalks Celery, chopped
2 Carrots, chopped
1 Yam, cubed
1 Potato, cubed
2 Turnips, cubed
1 Parsnip, cubed
1 can Tomato paste
4 cups Beef broth
1 cup dry Red wine
3 dashes Worcestershire sauce
1 tbsp Grainy mustard
1 tsp Cayenne pepper
1 cup Parsley, chopped
1 sprig Rosemary
Salt & Pepper

The Skinny:

  1. Combined flour, salt and butter  into a large mixing bowl and mix. Ensure that each small cube of butter is coated in flour. Then form a well in the centre and add the water slowly, while mixing until it forms a dough ball. Wrap the ball in cling wrap and set it aside in the fridge for 20 minutes.
  2. Flour a surface and kneed the dough ball into a rectangle shape. Using a rolling pin (or bottle of win) in only one direction, roll out the dough into a elongated rectangle. Fold the top 1/3 of the rectangle towards the centre and then fold the bottom 1/3 towards the centre. Rotate 90* and roll the dough into another elongated rectangle. Fold into thirds again, wrap in cling wrap, and set aside in the fridge for an hour (longer if you can). Video instructions are provided here.
  3. Bring a large pot of water to a boil, and add all of the vegetables except for the fava beans and celery with a bullion cube and boil for about 10 minutes. Add the remaining vegetables and boil for another 5 minutes then strain.
  4. Add oil to the same pot and saute the onions and garlic until they start to become translucent. Add the lamb and cook on medium-low for 10 minutes then add the parsley, Worcestershire sauce, rosemary, mustard, wine, cayenne pepper,  and beef broth then cover and simmer for 30-45 minutes on medium-low.
  5. Add tomato paste to thicken. If the lamb filling isn't thick enough add cornstarch into enough water to make a slurry and slowly add the slurry into the lamb until desired consistency, ensuring to mix frequently. I used 2 heaping tbsp of cornstarch in 1 cup of water (I can't remember how much, but it was around there).
  6. Place vegetable mixture into individual oven safe dishes, or into a greased 8x12 dish. Put the lamb mixture on top of the vegetables. Finally, place the crust on the top and pinch the edges around the perimeter of the dish. Brush on olive oil or melted butter if desired. Add slits into the crust so that the inside can "breathe."
  7. Place into a pre-heated oven at 350* for 25 minutes or until pastry is golden brown. Remove from the oven and let set for 10-15 minutes. Serve and enjoy!


Stay rad - H.

Thursday, March 29, 2012

Poached Egg Over Creamy Polenta (with mushrooms, blue cheese & pistachios)

There are times in a young woman's life when she just needs to let go and dive in...

...When she's gotta let her (short) hair down....

...Throw caution to the wind....

...And just do it...

...When she just needs to take a chance...

...And indulge her fantasies...

That happened...


Holy Hannah Montana!

Seriously. I saw this recipe and food orgasm'd. Twice.

Anyone who knows me know I love me some good polenta. Toss in a few mushrooms, a couple bold flavors like blue cheese and pistachios, and top it off with a creamy decadent poached egg - and you've got yourself a lover for life. Whether you want me or not. 

Simple. Divine. Comforting. Gourmet. And all at the same time. I love it.

Poached Egg Over Creamy Polenta
(with mushrooms, blue cheese & pistachios)
adapted from The Healthy Foodie 

Ingredients:

1 C Fine Ground Cornmeal.
6 Cups Salted Water or Chicken/Veggie Stock (or mixture of both).
80g Fresh Mushrooms (I used a mixture of oyster & shiitake).
1 Zucchini, cut into quarters and BBQ'd briefly (these were leftovers I just chucked in).
40g Pistachio, shelled & roughly chopped.
40g Blue Cheese, crumbled.
1 Tsp Fresh Thyme, de-stemmed & roughly chopped.
1 Lemon for juice.
3/4 C Parmesan Cheese, grated.
Kosher Salt & Fresh Cracked Black Pepper.
1 Poached Egg.
Drizzle of Truffle Oil (optional).
What to Do:

In a large saucepan, bring the juice of half a lemon and the stock or salted water to a light boil over medium heat.

Add corn meal with a Tsp or two of salt and pepper in a slow steady stream, whisking continually. Once you have added all the cornmeal, reduce the heat to medium-low. Whisk/cook for about 10 minutes or until cornmeal has reached the desired consistency and cooked through. Don't stop whisking though or it'll clump!

Take off heat, stir in fresh thyme and parmesan. Mix well. Cover and set aside until plating. 

Drizzle a little bit of olive oil in a  medium non stick frying pan and heat over medium-high heat. Add the mushrooms and cook until nice and golden on both sides, about 2-3 minutes total.

Meanwhile, poach the egg. In a small pan heat some salted water over medium-high heat. As it heats, crack the egg into a small bowl. Add a little vinegar (about a Tbsp) to the water and the juice from half a lemon - this will keep your whites from flying around when you pour the egg in. When water starts to simmer, gently slip the egg in the water and push it back with a large spoon to help it take shape.

Cover lightly and cook for about 2-3 minutes, until white is completely set and opaque but yolk is still runny. Remove from water with a slotted spoon and allow to drain well.

Laddle polenta into a bowl or shallow serving plate. Top with the mushrooms and poached egg. Sprinkle generously with blue cheese and chopped pistachios on top. 

Garnish with a few sprigs of fresh thyme, a small sprinkle of salt and pepper, and if you like - a little truffle oil. Serve while hot!


Eat.

 What dishes or ingredients give you double food orgasm?

Photobucket


This post is linked up with This Chick Cooks; Cast Party Wednesday; Simple Lives Thursday; Full Plate Thursday; Tastetastic Thursday;Fresh Bites Friday; The Hearth & Soul Blog Hop via The 21st Century Housewife; Tasty Tuesdays; Slightly Indulgent Tuesday; Tuesday Talent Show.

Wednesday, February 29, 2012

Braising Greens & Caramelized Onion Tacos

Anyone who spends any time perusing food blogs or magazines or sometimes even friend's recipe boxes has a list.

You know what I'm talking about.

A collection of an absurd amount of recipes that our eyes spot and our taste buds dare us to make. And then eat. Regardless of fat content, complexity, or time intensiveness. We want those dishes. 


Some of them get made. Others lay quietly in wait. I currently have over 300 bookmarked, heaps pinned, and even more dog-eared. Well, dear taste buds...

...Challenge accepted!

I've been meaning to make this recipe for a while now, especially with the amount of braising greens we're getting from our CSA (community supported agriculture) box. A girl can only cook them this way so many times. 


If you read my other blog, you've heard of Sam @ Cooking My Way Through My CSA before. I heart her. She's a kindred for sure. Only on the opposite side of the continent. Back in September she made Chard & Caramelized Onion Tacos. Pitter-patter went my little heart soul! And so now - 5 months later - I'm making them!


I did have to modify her recipe a touch. My braising greens were mostly kale with flecks of chard. Instead of salsa - which I've never been much of a fan of unless there's corona & lime involved - I substituted a balsamic reduction for acidity. I also chucked in some butternut squash I had on hand as well as some white beans for protein. 


The result? Savory West coast Winter tacos that were fun to assemble, a flavor punch in the face (in a good way), and a new staple dish that I'll be making again. Sam, you ARE a genius. 

Braising Greens & Caramelized Onion Tacos


Ingredients:

1 Package Organic Corn Tortillas.
1 Large Onion, peeled & thinly sliced.
3-4 Large Handfuls of Braising Greens, cleaned.
2 Garlic Cloves, peeled & finely chopped.
1 Lemon for juice & zest.
1 C White Beans, cooked (canned beans would work in a pinch if necessary, drain well).
1/2 Medium - Large Butternut Squash, peeled & chopped into 1" pieces.
2-4 oz. Queso Fresco or Feta Cheese, crumbled.
1 Tsp Crushed Pepper Flakes (optional).
Extra Virgin Olive Oil.
Kosher Salt & Fresh Cracked Black Pepper.

What to Do:

Pre-heat your oven to 475 degrees F.

In a shallow baking pan, throw in the squash with a couple glugs of olive oil and a nice helping of salt and pepper. Arrange as a single layer in the pan. Roast uncovered for 20-30 minutes or until just fork tender but still holding it's shape and generously colored on the down side. You may want to mix/shake the pan half way through cooking.

Meanwhile, heat a couple Tbsp of oil in a large non-stick pan over medium-low heat. Once hot, add the onions with a sprinkle of salt. Mix well. Allow to caramelize slowly, stirring occasionally to ensure even browning. This should go on for about 20 minutes or so until the onions are deep brown and sticky. Set aside.

In that same pan, carefully add about 1/4 C of water and the braising greens. Cover. Allow to steam for about 3 to 5 minutes. Remove the lid and toss in the garlic, half the lemon juice, and chilies if using. Cook for about 1 minute, remove from the heat and set aside. 

In a bowl, combine beans, lemon zest, the rest of the juice, and a good helping of salt and pepper. Mix well. Taste.

Heat tortillas according to package directions.

Assemble! Throw everything on a hot tortilla and top with a little cheese and a drizzle of balsamic reduction. About 2-3 tacos per person should fill people with a side salad.


Eat.


Photobucket


This post is linked up with Tasty Tuesdays; Slightly Indulgent Tuesday; Tuesday Talent Show; This Chick Cooks; Cast Party Wednesday; Simple Lives Thursday; Full Plate Thursday; Tasteastic Thursday; Fresh Bites Friday; Fight Back Friday; Seasonal Inspiration Saturday; Seasonal Celebration Sunday