Tuesday, March 27, 2012

Beet Medley & Quail Egg Salad w/ Honey Anise Vinaigrette

The Lowdown:

Okay, so this is meal is purely because I have been a horrible person over the last few days. I'm pretty sure in the last week I've eaten fast food at least 40 times. Not to mention, my lovely girlfriend declared that she only wanted to eat fruits and vegetables all day (Ha! That's going to happen). To make up for all that crap I've put into my body, I'm going to repent. I'm sorry father for I have sinned, please accept this healthy meal as a testament to my willingness to change my ways... temporarily.

How could this meal possibly be bad? It has more beets than Dr. Dre. Normally I hate salads. I find them boring, cold, and about as eventful as a Dilbert comic strip. How is that comic still being produced anyway? I mean seriously. The only thing funny about it is the irony that it isn't funny. 
http://search.dilbert.com/comic/Reference, 2012
Point, set, and match. This is crap. Now that I've wasted a sufficient amount of your life reading that comic strip I will resume with wasting a sufficient amount of your life reading this post. 

To recap; salad = Dilbert = boring. 
Where as, beets + quail's eggs + anise = ♥.

Just so everyone knows, I hate black licorice. However, the hint of it that this dressing has goes quite nicely with the earthy notes of the beets. Other than the pain of getting the anise seeds out of the husks (I actually just got lazy and blended the crap out of the star anise pods), this was a simple and easy recipe that offered quite a different take on the usual ways to prepare beets. The different colour beets also provide for a nice display and can add to the wow factor. It is also a great cure for the common fast food bender.

The Playlist:


1 Red beet
1 Golden beet
1 Candycane beet
2 Chicken breasts, cooked and thinly sliced (optional)
5-10 Quail's eggs, hard boiled
1 cube, Chicken bullion
Salt & Pepper
Olive oil

Vinaigrette

1/2 inch Leak (white part), minced
1 tsp Pepper (or more to taste)
1 tsp Kosher salt
1/8 cup Apple cider vinegar
1/8 cup Champagne berry vinegar
1/4 cup Virgin olive oil
1-2 tbsp Honey
1tsp Anise seeds, ground


The Skinny:

  1.  Mix all the vinaigrette ingredients together and refrigerate until ready to be served.
  2. Put the beets in separate pots and cover with water (the candycane and golden beets can go into the same pot). Add the chicken bullion to the water. Bring to a boil and cook until beets pass the "fork test" (about 45-60mins). Pour water out of pots and fill with cold water. Allow beets to cool.
  3. In a small pot add quail's eggs and enough water to boil them in. Boil for 5 minutes then remove from heat, allow to sit for 5 minutes, and then pour the water out. Allow eggs to cool.
  4. Skin the beets. If cooked properly you should be able to apply pressure using your thumbs and the skin will come off easily. (The beets can be done ahead of time and refrigerated).
  5. Peal the shells off of the quail's eggs and cut in half lengthwise.
  6. On medium heat, heat olive oil (or butter) in two large pans. Place the different colour beets in separate pans and saute until slightly browned (10-20mins).
  7. Add salt and pepper to taste.
  8. Put beets, chicken, and eggs together and add dressing.
  9. Serve while beets are still warm.


Featured in:33 Shades of Green, Chef-in-Training, Mandy's Recipe Box,


Stay Rad - H

Thursday, March 22, 2012

Homemade Hearty Beef Stew

Confession: I always feel a little conflicted about posting very "meaty" recipes. 

Those who know me know that I am an "ethical" eater. That is, I try to eat most of my food small organic, small scale, seasonal, and local. That can be tricky with meat.


Or at the very least, it complicates things a little more. It not only needs to be all of the above, but pastured and NOT grain fed, as well.

Side Note: I've noticed in the grocery store lately that producers are advertizing their meat as "grain fed" - particularly the beef and chicken. If you get anything out of this post get this... 

Grain fed is not a good thing. 

Animals are not meant to eat grain. Sure, they aren't being fed the chicken litter off the chicken barn floor or left over beef bits (yes, that is what conventional meat is fed) = a whole lot of excess antibiotics, hormones, and possible health risks for you; but grain isn't much better. It's likely genetically modified or engineered, grown on mass scale with chemical inputs, and shipped all over the world. You are eating all of that when you eat your grain fed meat. Not to mention what that kind of diet does to the animal who consumed it to begin with. 

Instead: Google a few hits, make a few phone calls and find which producers and/or sellers in your area are raising organic pastured animals. Pastured is key. Pastured is a way of living - both for the eater and the animal. It fosters the essence of the cow, or pig, or chicken, or goat, or bison, or lamb, or whatever your poison is. For more information on pastured meat, click here.

Back to reality: Right. So, organic, small scale, seasonal, local & pastured meat. Tall order. And the guilt that comes with posting about meat. 


We need to cut down our meat consumption for a sovereign food system. And when I post about meat - particularly without the above premise - I feel like I'm not doing the world any good. Does posting my meaty meal encourage more meat consumption rather than less? Or does it encourage a holistic, and natural way of eating seasonally? Am I thinking this through too much? Ah!

So meat: Eat less. When you do eat, eat pastured. And don't think I'm obsessing.... I might be obsessing. Just a little.

Homemade Hearty Beef Stew


Ingredients:

1 1/2 Lb Chuck Stew Meat, cut into 1-2" pieces.
3 Small-Medium Turnips, peeled & chopped into 1" pieces.
3 Carrots, chopped into 1" pieces.
8 New Baby Red Skin Potatoes, cut in half.
3 Stalks of Celery, chopped.
1 Onion, chopped into 2" thick slices.
5 Garlic Cloves, peeled.
2 C Beef Stock.
28 oz. Canned Tomatoes.
1 C Dry Red Wine.
Italian Seasonings (i.e. Basil, Thyme, Oregano, Rosemary, etc...).
1 Bay Leaf.
Extra Virgin Olive Oil.
 Kosher Salt & Fresh Cracked Black Pepper.

What to Do:

Heat a large pan over medium-high heat. Once hot, add the beef pieces - you may have to do this in batches. Brown well all over. Remove from the pan and put in a large stock pot.

Once the beef is browned, turn the heat down to medium. Add a couple glugs of olive oil to the pan and add the carrots, celery and onion - this is the base of the stew (and many other dishes), it's called a Mirepoix (meer-pwah). Stir well to coat. Cook for about 5 minutes or until just starting to get a bit of color on the vegetables, stirring occasionally.

Add the tomatoes, seasonings, bay leaf, and wine. Season with salt and pepper. Allow the wine to reduce for about 5 minutes. Pour the mixture into the stock pot along with the beef stock, turnips, and garlic cloves.

Bring to a boil over high heat. Cover, reduce heat to a simmer, and allow to slow cook the mixture for 2 1/2 - 3 hours.

In the final half hour of cooking, add the potatoes and make sure they're covered with the liquid.

Season with salt and pepper to taste. Serve with a great big hunk of honey'd corn bread.


Eat.

What do you obsess over? 
What do you think about my meat issue? Have you ever thought about this "grain fed" business? What kind of "happy" meat or vegetables are available near you?


Photobucket

This post is linked up with Cast Party Wednesday; This Chick Cooks; Full Plate Thursday; Tastetastic Thursday; Fight Back Friday; Fresh Bites Friday; Seasonal Inspiration Saturday;

Tuesday, March 20, 2012

Smoky Chipotle Lasagna


The Lowdown:

Dear diary, I have found a new love. Not the kind you leave your significant other for, but maybe the kind that you start to pay a bit more attention to. The kind you get to know it a bit better before you jump to any rash decisions. I recently found real chipotle peppers (smoked jalapenos), not the crumby canned ones, in my secret grocery store. Well, maybe it's not a secret store, but regardless, I found these delightful little morsels of awesomeness there. You'll know they are the real deal because they look like a fourteen week old dog turd and smell like a campfire. On a daily basis these are two things that should never be combined. However, in this specific instance, the jury and I will allow it. No further questioning your Honour; defence rests. Another great thing about them is that they don't go bad. Smoky and invincible -- how glorious (as a sunbeam shoots down from the heavens to land squarely on the chipotle pepper, illuminating it with a holy aura). Since I've found these awesome flavour bombs I've been having a bit of fun. Chipotle soups, chipotle rice, chipotle lasagna, chipotle everything! Well... NO CHIPOTLE AIOLI! I hate hate hate aioli. So please, lets just get over this stupid aioli fad. Great, now I need to listen to some calming music.

I've never made a lasagna before. I have definately eaten them though. Oh have I ever eaten them. Scrumptious devils. So this is my first attempt at a lasagna. The zuchinni was purely for health reasons and the corn was to make it a bit more southern. I used cream cheese because I recall really disliking the "normal" cheese that goes in lasagna (ricatta I think). Also, I'm lactose intollerant, so wish me (and my girlfriend) luck after eating this one. 

The Playlist:

2-3 Chipotle peppers, finely ground
1 lb Ground beef
1 lb Spicy Italian sausage, casings removed
1 can Crushed tomatoes
1 can Diced tomatoes
1 can Tomato paste
1 Red onion, chopped
5 cloves Garlic, chopped
1/2 cup Fresh herbs (basil, thyme, oregano), finely chopped
8 oz Cream cheese
1 lb Frozen spinach, thawed
Salt & Pepper, to taste
9-12 Lasagna noodles, el dante
Cheese of your choice to top (jalapeno havarti and smoked gouda work well)

OPTIONAL:
1 Zuchinni, sliced
1 ear of Corn, kernels removed (or 1 can of corn kernels).


The Skinny:

  1. Brown the beef and Italian sausage in a large pot
  2. Add onions, garlic, and chipotle pepper and cook until onions start to become translucent.
  3. Add all tomato products, cover, and cook for 30 minutes on medium-low heat.
  4. Add herbs and cook for another 15 minutes.
  5. Mix spinach (or corn, or both) and cream cheese in a bowl.
  6. Cook pasta noodles (read instructions on package for optimum cooking time).
  7. Grease a 9 x 13 baking dish.
  8. Layer as desired starting with lasagna noodles (I did noodles, tomato mixture, noodles, tomato mixture, zuchinni, cream cheese/corn, noodles, tomato mixture, noodles, cheese).
  9. Cover with aluminum foil and let sit (over night preferably).
  10. Preheat oven to 400*.
  11. Bake for 40 minutes with the aluminum foil on, then remove aluminum foil and bake for another 15 minutes or until cheese is browned.


Featured on: Blessed with Grace, Naptime Creations, Mandy's Recipe Box, Shine Your Light, Things that Make you say "Mmmm", Jam Hands

Thursday, March 15, 2012

RPI: MIssion Espresso - Tiramisu

Last night was the most fun I've had in as long as I can remember.

No, not that kind of fun. I wish. 

No, I don't wish. This was better. This was joyous! And phenomenal! And just. plain. epic.

Oh yes - epic. I'm not exaggerating. Last night was absolutely life changing. 


Last night.... I saw Fred Penner. No wait. I experienced Fred Penner.

Do you know who Fred Penner is? You should. He's a beloved and monarch honoured Canadian children's entertainer. His era was in the mid eights - late nineties and he brought musical joy to millions of Canadian children on his television show Fred Penner's Place. These days, he tours the bar scene and does the same thing for the same people, only 15-20 years older.

Who woulda' known that songs like The Cat Came Back, or Sandwiches, or I Had a Rooster, or my personal favourite, Puff the Magic Dragon could elicit such a positive response from so many grown adults. If you can call University kids adults.


Seriously. This guy is either the most generous, kind, and altruistic man that has ever lived... Or he's sure cashing in on a nostalgic gaping wound that has embedded itself in the souls of Canadian University students. 


Did I also mention I got a t-shirt....? And had it signed....? 

Thank you Fred!!!

And now, something to make your little mouth sing: RPI mission - espresso!


I toiled for a bit as to whether I should make a drink or something savory. But after sending out some feelers on Twitter the response was over-whelming: Tiramisu. I know, it seems like the obvious choice for espresso. And it was, which was why I was avoiding it to begin with. But after eating it, I realized there's a reason why the obvious choice is the obvious choice. Because it's fucking good. 

Classic Tiramisu
adapted from Guy Fieri


Ingredients:

 2 C Strongly Brewed Coffee, cooled off.
4-5 Ounces Kahlua (boozy = good!).
3 Egg Yolks.
1 3/4 C Whipping Cream.
1/2 C Sugar.
2 C Mascarpone Cheese.
36 to 42 Lady Finger Cookies.
2 Tbsp Unsweetened Cocoa Powder.
1/4 C Good Quality Shaved Bittersweet Chocolate (optional).

What to Do:

Combine the coffee and the booze in a bowl and set aside.

Bring to a boil a small saucepan with 2 inches of water in it over high heat. Place a glass bowl over the top of the pot to act as a double boiler and add the egg yolks and 1/2 C of the whipping cream. Whisk continually until mixture coats the back of a spoon - approx 5-6 minutes. Remove from the heat and continue whisking for a further 3-4 minutes as it cools. Set aside to cool completely - about 15 to 20 minutes.

Once cooled, in a larger bowl add the remaining whipping cream, prepared yolk mixture, and sugar and beat until soft peaks form. 

*Now, I did this for 30 minutes and it still wouldn't firm up! Not sure why - either way my tiramisu turned out spectacular. If you have any idea why it didn't work (I had a very cold bowl and even put a bag of peas underneath it to help keep it cold) please let me know!

Add the mascarpone cheese and combine well.

Now assemble! Measure out how many lady fingers will fit in the bottom of you pan. I used a 9 X 9 baking dish though the original recipe calls for 9 X 13. Your choice. Now that you know how the cookies will fit in the dish, dip each one briefly on both sides in the coffee/boozy mixture. Place back in the pan. 

After the first layer of cookies are in the pan, spread half the mascarpone mixture over the cookies and sprinkle with half the cocoa powder. Repeat starting with the cookies dipping in the coffee. 

Cover tightly with plastic wrap and refrigerate for at least 6 hours or even better, over night.

If desired, shave the chocolate over the top just before serving. Cut into squares, and serve.

Eat.

Photobucket

Tuesday, March 13, 2012

Braised Beef Short Ribs w/ Espresso & Guiness Reduction

The Lowdown:

Let's just say the dinner party turned more party than dinner. For that reason I am posting late, and it's going to be short and sweet because all I really want to do is go get a frosty and spicy "chicken" burger from Wendy's. On a brighter note, we did discover a great bottle of wine for under $10. For any Americans reading this, that is a good deal in Canada. It's a Spanish wine by the name of Lujuria, and it packs a punch that is much more expensive than you pay for. But let's not kid ourselves, it has a cool picture on the label and that's why I bought it. I'm not claiming to be any sort of wine expert, but I do know a cool label when I see one. The price was right as well.

Lujuria: $10
Short Ribs: $7
Potatoes: $3
Making an ass of yourself in front of your girlfriend's coworkers: Priceless.

This is our 3rd installment of RPI. If you need to refresh your memory about what RPI is you can look at it under the Rock Paper Ingredient tab on the top bar. As always I won it, but this time I chose a better ingredient. Espresso! Yayayayayayyayayayayayayaya! (that's how I would react if I had one right now. Just like the coffee scene in Starsky and Hutch. God I just love this coffee). As per usual, I left it till the very last day. This time; however, it worked in my favour. As I was perusing through the store, hopelessly trying to think of something to make, I stopped by the meat section and short ribs were on sale for half off! If I weren't so lazy and my brain wasn't currently trying to implode in my head (blasted wine I tell you) I would write a short essay on how much I love short ribs. Instead I'm just going to state it: I love short ribs. Did I mention that I won RPI again?

The dinner party was a great success. The girls all played on their phones, and the men made fun of them. The first course was a chipotle stuffing risotto w/ a golden plum, ginger, and cranberry chutney. The main course was the braised beef short ribs served with turmeric smashed potatoes (to make them yellow so that they would really contrast with the reduction), white wine braised red chard, and the espresso reduction.

The Playlist:

(Printable Recipe)

6 Beef short ribs, bone in.
3 tbsp, Olive oil.
2 stalks Celery, chopped.
2 Carrots, chopped.
1 Onion, chopped.
5 cloves Garlic
2 Roma tomatoes, chopped.
2 cups Red wine (fuller body = better).
1 can Tomato paste.
2 Bay leaves.
1 sprig Sage (4-5 leaves).
1 tsp Basil, dried.
1 tsp Paprika.
Salt & Pepper.

250 ml Cream
1 bottle Stout (Guinness will do).
6 oz Espresso
6 tbsp Honey
1 tbsp Corn Starch
3 oz water

The Skinny:

  1. Put a generous amount of salt and pepper on each short rib.
  2. Heat olive oil in a large pot on medium-high (ensure it is oven safe) and brown short ribs on both sides.
  3. While ribs are browning add all of the vegetables, onion, and garlic into a blender and blend until a thick paste forms. Add a bit of the wine if it is required to get the blades moving.
  4. Remove ribs from the pan and add the vegetable paste.
  5. Allow the vegetable paste to thicken, stirring occasionally (about 15 minutes).
  6. Add the wine, sage, basil, bay leaves, salt, pepper, and tomato paste and allow enough time to reduce the sauce by half.
  7. Add ribs back into the sauce, cover the pan, and put into the oven for 3 hours 30 minutes.
  8. Turn the ribs over when half of the time has elapsed and add water if the paste has thickened too much.
  9. Remove the lid when only 30 minutes remains to allow the ribs to brown (I now have two blisters on my fingers so remember to use oven mitts).
  10. Add the stout, espresso, and cream into a large sauce pan and heat up slowly until it gently boils and mix periodically.
  11. Allow for 1/2 to 3/4 of the liquid to reduce then add the corn starch and water until desired consistency is reached.
  12. Remove ribs from braising liquid and serve.

    The braising liquid can be used in a pasta sauce or minestrone soup, so don't worry about wasting it. 


    Stay Rad - H

    Featured in: Shine Your Light,  Miz Helen's Country Cottage, Mandy's Recipe Box, Naptime Creations

      Thursday, March 08, 2012

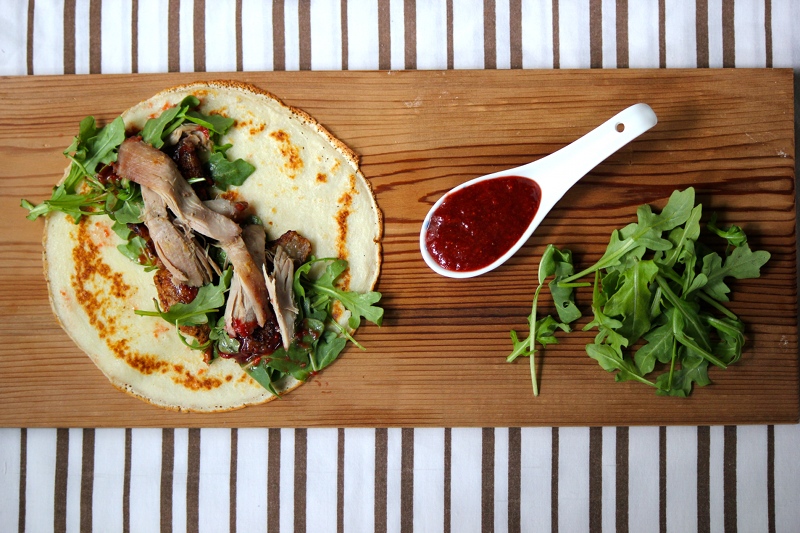
      Savory Roast Duck Crepes with Arugula & Stawberry Plum Sauce

      Good morning my little sugar bottoms! I have a question for you...

      Do you know how to roast a bird?

      The usual suspects are turkey or chicken. Simple, traditional, tasty. Chances are your mother or grandmother or someone in the family taught you. Or you can at least remember chowin down on one of these fine creatures on Thanksgiving or Christmas or Easter (assuming you celebrate one or all of these colonial & Christian holidays) or in the case of my family, while camping. Yes, my mother required her camping oven be large enough to fit a full turkey. We really roughed it growing up.


      But did you know you can roast duck the same way?  It's a little more work, but not by much. 

      I was talking to John the other day and we were both commenting on how easy roasting a duck is but no one seems to do it. No one we know, anyway. It's just not in our cultural repertoire. That being said, there's no reason not to start! 


      Now, don't let the cuteness of the little Quack Quacks fool you - their meat is sweet, earthy, moist, and so succulently worth it. Plus you end up with a jar full of duck fat! You think bacon is good, well my friend, duck fat makes everything better. Mmmmmm, duck fat. There's a reason my pants don't fit me anymore. 


      FYI: The meat on a duck is limited and one duck typically feeds two very hungry people or three muchie people. Try to find one that's been able to roam and eat what it would naturally and organically - find a happy duck! And then eat him! ...well, maybe kill & cook him first. It's the humanly thing to do.

      Savory Roast Duck Crepes with Arugula & Strawberry Plum Sauce


      Ingredients for Crepes:

      2 C Whole Milk.
      4 Large Free-Range Organic Eggs, room temperature.
      1 Tbsp Unsalted Butter, room temperature.
      1 1/2 C Flour.
      1 Tsp Sea Salt.

      Ingredients for Sauce:

      2 C Frozen Strawberries, thawed & drained.
      3-4 Plums, pitted (mine were frozen, I thawed & drained them as well).
      Zest & Juice of 1 Blood Orange.
      2 Tbsp Local Organic Honey.
      2 Tbsp Balsamic Reduction.
      Kosher Salt & Fresh Cracked Black Pepper.

      Other Ingredients:

      1 Whole Duck.
      1/2 Onion, chopped.
      3 Garlic Cloves, peeled & smashed.
      1/2 Orange, cut into 2 or 3 pieces.
      Kosher Salt & Fresh Cracked Black Pepper.
      Fresh Arugula, for topping.

      What to Do:

      Pre-heat your oven to 300 degrees F.

      Meanwhile, remove any giblets inside the duck, rinse well and pat dry with paper towels. Make sure to remove any remaining quills that may have been left behind and cut off any extra flaps of fat. Throw the "other ingredient" onion, garlic and orange inside the duck cavity and season very well with salt and pepper. Lift the little guy up by his legs and shake it around. Now tie the legs together nice and tight with some string (it's called "trussing") and tuck his little arms back underneath him - kind of like if you were to walk up behind someone and try to break their arms.

      Place the duck on a wire rack in a large roasting/baking pan. At an angle, gently slice through the skin of the duck to ensure the fat will cook/leak off during the cooking process so you end up with crispy skin. Careful not to cut the meat though - only the fat! 

      Using a smaller knife, prick the little guy all over to increase fat drippage. Again, focus on hitting the fat, not the meat. Season the outside with salt and pepper, front and back. Place the duck breast side up on the rack and place in oven. 

      Cook 1 hour. Re-prick with small knife. Flip onto the other side. Repeat this step 3 times for a total cooking time of 4 hours.

      Turn the heat in the oven up to 400 degrees and cook for a further 15-20 minutes.

      By now the skin should be super crispy. Remove from the oven and let sit for about 15 minutes. Then, peel off the skin and meat, reserve, while tossing the bones, stuffed vegetables, etc... Voila! Duck! 

      Be careful when cooking duck - they are uber fatty! You can wait for the fat to cool before you dispose of it or you can let it cool slightly, pour it in a jar and stick it in the back of your fridge for roasting potatoes, etc... It's to die for!

      For a photo tutorial of this process, click here.

      Now, as the duck reaches it's final 40 minutes or so of cooking, you can make the crepes and sauce.

      For the sauce, throw everything into a food processor. Blend till smooth. Taste. Add more of whatever you feel is necessary.

      For the crepes, add the wet to the wet, the dry to the dry, then combine. Whisk well until batter is smooth & consistent. Heat a small frying pan over medium heat, lightly grease with non-stick spray or butter and drop about 1/3rd a cup or so of the batter into the pan. Swivel the pan in a circular motion to coat the bottom with the batter evenly. Place back on the burner, cook about 1 min or until lightly golden on the bottom and rather solid on top, gently flip, and cook on the other side for about another 30 seconds or so. Remove from the pan, place in a covered baking dish and keep warm until serving.

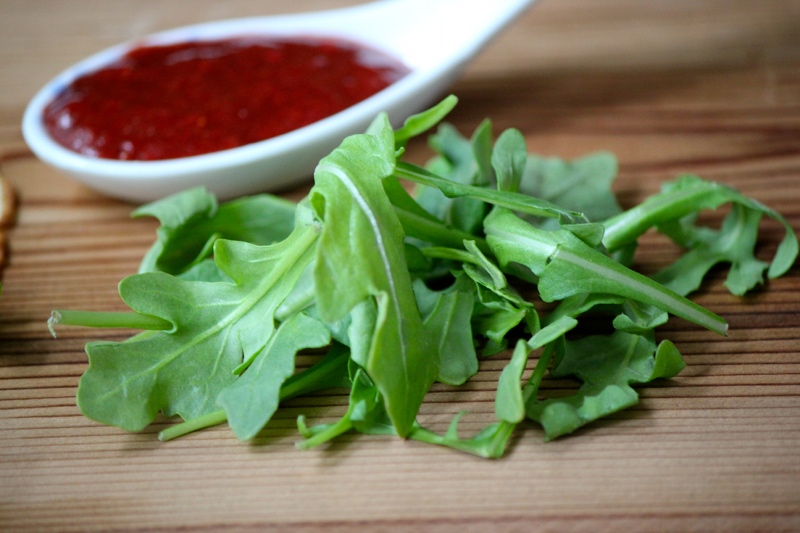
      To serve: take a crepe, chuck on some duck, some arugula, some sauce - roll.


      Eat.

      Photobucket

      This post is linked up with This Chick Cooks; Cast Party Wednesday; Full Plate Thursday; Simple Lives Thursday; Tastetastic Thursday; Fresh Bites Friday; Fight Back Friday; Seasonal Inspiration Saturday; Seasonal Celebration Sunday; Tasty Tuesdays; Slightly Indulgent Tuesday; Tuesday Talent Show; The Hearth & Soul Blog Hop via Premeditated Leftovers.

      Tuesday, March 06, 2012

      Thai Mango Red Curry w/ Grill Pineapple

       The Lowdown:

      Current scenario: thanks to Rock, Paper, Ingredient (RPI) there are about four thousand mangoes in my fridge at the moment and I have no idea what to do with them. The worst part is, I won RPI and chose mango as the ingredient. I don't even really like mango, nor have I ever used one for anything other than anger management while trying to peal and de-seed them. I'm used to winning; but unlike normal, I had to quickly think after winning RPI, rather than the usual celebration dance I normally do. I drew a blank, then blurted out mango in a desperate frenzy to fill the silence. Needless to say, the next time we play RPI, in which I'll likely win again, I'm going to have a game plan to avoid this less-than-desirable outcome.

      I digressed. So as I was saying, mangoes in fridge equals a lot. I was craving the spicy zing of a curry. I had Thai red curry paste already made. Hold up! Why not combined them? Yup, and that's why I'm a genius.

      The Playlist:


      The Usual Suspects
      1 Pineapple, quartered and sliced.
      1 Mango, cubed.
      1 Chicken breast (Optional).
      1 Album Aerosmith, greatest hits.

      3 +/- Chili Peppers, diced.
      1/2 Stalk Lemongrass, fresh.
      3 +/- Kaffir Lime Leaves.
      1 1/2 +/- Cups Chicken Stock.
      3 +/- Tbsp Thai Red Curry Paste
      Deep Terracotta Colour
      1/2 +/- Coconut Milk (Optional).


      The Skinny:

      1.  Turn on Aerosmith and rock out by yourself in the Kitchen to "Love in an Elevator."
      2. On medium heat, put oil into a wok or large skillet and bring it to that special temperature.
      3. Put, toss, throw, or drip using a titration set (I don't really care, just be careful) the curry paste into the warm oil and broth.
      4. Allow the curry paste to release its fragrance, then add the chicken broth.
      5. Add the lemongrass stock, chili peppers, and kaffir lime leaves.
      6. Cover the wok and turn down the heat to medium-low.
      7. Allow the curry paste to gently simmer for 30 - 40 minutes until it turns to a deep terracotta colour (I just made that up, but it does change colour).

        If cooking rice, now would be the time to start that whole fiasco.
         
      8. Remove lid, turn heat up to medium, and add mango.
      9. Bring to a gentle boil and cook for five minutes (retain mango's shape, colour and texture).
      10. Cook protein in a seperate pan if desired.
      11. In a separate pan heat oil on medium-high and sear the pineapple on either side (one to two minutes per side).
      12. Remove pineapple and curry from the heat.
      13. Serve. Eat. Enjoy.
      14. Thank me later.
      If the curry is too thick for your liking add more chicken broth. If it is too spicy add more mango or coconut milk. If it is too thin add the coagulated portion of the coconut milk or remove lid and boil it off. If it isn't spicy enough add some white pepper and cayenne pepper. If you want to turn it into a noodle soup double the amount of curry paste and chicken broth. If you want other vegetables, add the other vegetables. If you want a stronger citrus flavour then add more lemon grass, kaffir lime leaves, and/or lemon juice.

      Removing the lid during the final stages is an important part of this meal. Yes, it helps thicken the sauce. That of course, is secondary to the aroma that it releases. If everyone isn't already in the kitchen (we know how dinner parties go) then they sure will be after you unleash this scent explosion. I got carried away, but scent is an extremely important factor in Thai cooking. If you don't believe me, leave your house for 2-3 minutes and work off that bottle of beer you had while cooking. After you pretend to do that, return to your kitchen and see how much of an impact the aroma truly has.

      I excluded coconut milk from the instructions because I didn't feel like putting it in this time. If you are going to use it, bring it to a gentle boil and allow to simmer for 20 minutes, then add it to your curry paste. Also, a curry paste recipe will be up shortly. I just happen to have some in my fridge that I had made previously.


      The Final Product -- A Mango Chicken Thai Red Curry w/ Grilled Pineapple